No repair is complete without a drill. This electrical device is powered by mains or battery. If you choose a cordless drill for work, you will also need a charger for it. It is sold complete with the device. However, such an element sooner or later fails. To avoid an unfortunate circumstance, you should study the design capabilities and description of the chargers. It is especially worth getting acquainted with the circuit diagram of the drill-driver charger. This will help you know how to repair it correctly.
There are many types of devices for charging cordless drills. They differ in price, operating principle and repair features. Each type of screwdriver should be considered in more detail.
Such devices are quite popular due to their low cost. If the drill will not be used for professional purposes, you should not focus on the duration of work. The main condition that the simplest charger must meet is that it must provide sufficient current load to charge the screwdriver battery.

Important! To start charging, it is necessary that the voltage at the output of the power supply is higher than the nominal value of the device battery.
The operation of an analog device with a power supply is quite simple. This charger is used as a stabilizer. For example, you need to consider the charger circuit for a battery from 9 to 11 V. It does not matter what type of battery is used. Cordless drills and screwdrivers are quite common among home craftsmen, so knowledge of the features of their repair will be useful to everyone.

Many home craftsmen assemble this power supply with their own hands. Soldering the circuit can only be done on a universal board. To ensure heat dissipation of the stabilizer chip, it is necessary to find a copper radiator of 20 square meters. cm area.
Attention! Stabilizers are operated according to the compensation principle. Excess energy can be removed in the form of heat.
Thanks to the output transformer, the alternating voltage is reduced from 220 V to 20 V. You can calculate what the power of the transformer will be based on the voltage current at the charging output. AC rectification is carried out by a diode bridge.

After rectification, the current turns out to be pulsating. However, this feature of the current negatively affects the functioning of the circuit. Ripple can be smoothed out using a filter capacitor (C1). The KR 142EN microcircuit is used as a stabilizer. Radio amateurs call it “krenka”. To get a voltage of 12 V, you must have a microcircuit with index 8B. The control is assembled on transistor VT2. In addition, trimming resistors are used. Automation is not installed on such devices. How long the battery will take to charge depends on the user. To control the charge, a fairly simple circuit is assembled using transistor VT1. The circuit also contains diode VD2. When the charging voltage is reached, the indicator goes out.
More modern systems have a switch. Thanks to it, the voltage is turned off at the end of the charge. When you buy a cheap screwdriver, it comes with a simple charger. This explains why such devices break down very often. When purchasing such a screwdriver, the consumer risks being left with a new, but non-working device. However, the charger is easy to assemble with your own hands. The main thing is to have a plan.

A homemade device can last much longer than a purchased one. To select the battery value of a drill-driver, you will need to experimentally configure the transformer and stabilizer.
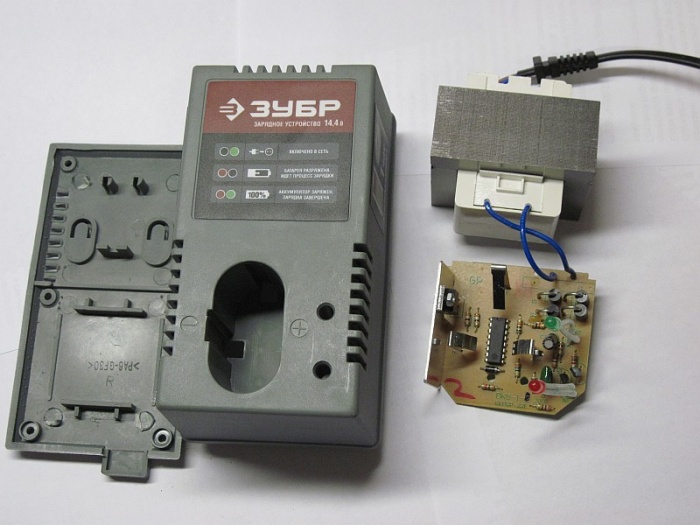
The charger circuit itself is quite simple. This device comes with a power supply and a charger. It makes no sense to inspect the power supply. Its design is standard. It includes a diode bridge, transformer, rectifier and capacitor filter. Typically the output is 18V.
Control is carried out using a small board, which has the size of a matchbox. Such assemblies do not have a heat removal system. For this reason, such devices quickly fail. Therefore, users are often interested in how to charge a cordless drill/driver without a charger.
You can solve this problem quite simply:
The control unit must have a diagram as in the photo:
An 18 V zener diode is installed at the input. The circuit that will control the charger operates on a KT817 transistor. To provide amplification, a KT818 transistor is installed. At the same time, it is equipped with a radiator for heat removal. Depending on the charging current, it can dissipate up to 10 W. It is necessary that the radiator has the required area - from 30 to 40 square meters. cm.
The unreliability of Chinese batteries is explained by the manufacturers' savings on matches. To set the exact charge current, you should have a 1 Kom trimmer. A 4.7 Ohm resistor is installed at the output. It should also provide sufficient heat dissipation. The output power does not exceed 5W.
The assembled circuit is quite simply placed in the standard charging case. The radiator does not have to be removed. The main thing is that there is sufficient air circulation inside the case. The power supply from the laptop is still used according to its intended purpose.
Important! One of the main disadvantages of analog chargers is the long charging process. In the case of a household cordless drill/driver, this is not a problem. It is enough for simple work. It is enough to charge it the night before work. A simple Chinese battery in a screwdriver usually lasts from 3 to 5 hours of operation.

Professional screwdrivers are designed for intensive use. Therefore, downtime during work is unacceptable. It is worth remembering that every serious device has a high price. Therefore, the price issue should be omitted. In addition, the kit usually includes 2 batteries.
The switching power supply is complemented by a “smart” control circuit. Thanks to this, the battery is charged to 100% in just an hour. You can build the same analog-type charger with your own hands. However, its dimensions will be equal to the dimensions of the screwdriver itself.
Pulse devices are good because they do not have many disadvantages. They are quite compact, have high charge currents and are equipped with a sophisticated protection system. There is only one problem - the circuitry of such devices is quite complex, which affects the cost of the device.
However, even such a device can be built on your own. The savings are approximately 2 times.
It is worth considering the option for nickel-cadmium batteries, which are equipped with a third signal contact. The circuit diagram of the device on the MAX713 is being assembled. This controller is quite popular. The output voltage will be 25 V. The current will be constant. Assembling such a power source is quite simple.

The charger is equipped with several features that make it smart. After the voltage level has been checked, it is necessary to start the accelerated discharge mode. This will prevent memory effect. The charge is carried out in one and a half hours. The main distinguishing feature of the circuit is the ability to select the type of battery and charge voltage.
With the release of a branded charger for a professional device, you can save a lot on repairing the charger for a screwdriver. The circuit can be assembled independently.

Quite often, owners of drills and screwdrivers are faced with a situation where the device itself is working properly, but the battery pack is faulty. There are many ways to solve this problem. However, not everyone will work with toxic parts.
To continue working with the screwdriver, you must connect an external power supply. If you have a standard Chinese device with 14.4 V batteries, you can use a car battery. However, there is another option - to find a transformer with an output voltage of 15-17 V in order to assemble a full-fledged power supply.
The necessary parts are inexpensive. First of all, you will need a thermostat and a diode bridge. Other design elements perform service functions - to show input and output voltage. There is no need to purchase a stabilizer. This is explained by the undemanding nature of the screwdriver motor.
As you can see, assembling the charger for a cordless drill is quite simple. The main thing is not to decide to immediately throw away an electrical appliance. If the batteries completely fail, the device can be converted to use a network one. This type of work also has many subtleties that you should become familiar with.

To build your own charger for a screwdriver, you will need to know the diagram of such a device and the characteristics of the main parts. The assembly process itself is quite simple. The main thing is to be able to work with a soldering iron.
Even if the power supply of a professional model of a screwdriver fails, it can be turned into a network one. If you decide to repair the device yourself, you don’t have to worry about the price of parts - they cost pennies on the radio market. Knowing these features of repairing cordless screwdrivers will help you do the job yourself.
A screwdriver is an indispensable tool, but the discovered flaw makes you think about making some modifications and improving the circuit of its charger. After leaving the screwdriver to charge overnight, the author of this video is a blogger AKA KASYAN The next morning I discovered heating of the battery of unknown origin. Moreover, the heating was quite serious. This is not normal and will dramatically reduce battery life. In addition, it is dangerous from a fire safety point of view.
Having disassembled the charger, it became clear that inside there was a simple circuit consisting of a transformer and a rectifier. Things were even worse at the docking station. An indicator LED and a small circuit on one transistor, which is only responsible for triggering the indicator when the battery is inserted into the docking station.
There are no charge control units or auto-shutdown, just a power supply that will charge indefinitely until the latter fails.
A search for information on the problem led to the conclusion that almost all budget screwdrivers have exactly the same charging system. And only expensive processor-controlled devices have smart charging and protection systems implemented both on the charger itself and in the battery. Agree, this is not normal. Perhaps, according to the author of the video, manufacturers specifically use such a system to ensure that batteries quickly fail. Market economy, conveyor belt of fools, marketing tactics and other clever and incomprehensible words.
Let's improve this device by adding a voltage stabilization system and charge current limitation. The battery is 18 volt, nickel-cadmium with a capacity of 1200 milliampere hours. The effective charge current for such a battery is no more than 120 milliamps. It will take a long time to charge, but it will be safe.
Let's first figure out what this modification will give us. Knowing the voltage of a charged battery, we will set exactly this voltage at the charger output. And when the battery is charged to the required level, the charging current will drop to 0. The process will stop, and current stabilization will allow the battery to be charged with a maximum current of no more than 120 milliamps, regardless of how discharged the latter is. In other words, we will automate the charging process and also add an indicator LED that will light up during the charging process and go off at the end of the process.
All the necessary radio components can be purchased cheaply in this Chinese store.
Node diagram. The design of such a unit is very simple and easy to implement. Costs only $1. Two lm317 microcircuits. The first is connected according to the current stabilizer circuit, the second stabilizes the output voltage.
So, we know that a current of about 120 milliamps will flow through the circuit. This is not a very large current, so there is no need to install a heat sink on the chip. This system works quite simply. During charging, a voltage drop is formed across resistor r1, which is enough for the LED to light up and as charging progresses, the current in the circuit will drop. After a certain amount of voltage drop across the transistor is insufficient, the LED will simply go out. Resistor r2 sets the maximum current. It is advisable to take it at 0.5 watt. Although it is possible at 0.25 watts. Using this link you can download a program for calculating the microcircuit.


This resistor has a resistance of about 10 ohms, which corresponds to a charging current of 120 milliamps. The second part is a threshold node. It stabilizes tension; the output voltage is set by selecting resistors r3, r4. For the most precise settings, the divider can be replaced with a 10 kilo-ohm multi-turn resistor.
The voltage at the output of the unconverted charger was about 26 volts, despite the fact that the test was carried out at a 3-watt load. The battery, as mentioned above, is 18 volts. Inside are 15 1.2 volt nickel-cadmium cans. The voltage of a fully charged battery is approximately 20.5 volts. That is, at the output of our node we need to set the voltage within 21 volts.

Now let's check the assembled block. As you can see, even with a short-circuited output, the current will not exceed 130 milliamps. And this is regardless of the input voltage, that is, the current limitation works as it should. We mount the assembled board into the docking station. We will use the original LED of the docking station as an indicator of the end of the charge, but with a transistor it is no longer needed.
The output voltage is also within the specified limits. Now you can connect the battery. The LED lights up, charging has begun, we will wait for the process to complete. As a result, we can say with confidence that we have definitely improved this charger. The battery does not heat up, and most importantly, it can be charged as much as you like, since the device automatically turns off when the battery is fully charged.
Often the original charger included with the screwdriver works slowly, taking a long time to charge the battery. For those who intensively use a screwdriver, this greatly interferes with their work. Despite the fact that the kit usually includes two batteries (one installed in the tool handle and in use, and the other connected to the charger and in the process of charging), owners often cannot adapt to the operating cycle of the batteries. Then it makes sense to make a charger yourself and charging will become more convenient.

Batteries are of different types and their charging modes may be different. Nickel-cadmium (Ni-Cd) batteries are a very good source of energy and are capable of delivering high power. However, for environmental reasons their production has ceased and they will become less and less common. Now they have been replaced everywhere by lithium-ion batteries.
Sulfuric acid (Pb) lead gel batteries have good characteristics, but they make the tool heavier and therefore are not very popular, despite their relative cheapness. Since they are gel (the sulfuric acid solution is thickened with sodium silicate), there are no plugs in them, the electrolyte does not leak out of them, and they can be used in any position. (By the way, nickel-cadmium batteries for screwdrivers also belong to the gel class.)
Lithium-ion batteries (Li-ion) are now the most promising and promoted in technology and on the market. Their feature is the complete sealing of the cell. They have a very high power density, are safe to use (thanks to the built-in charge controller!), can be disposed of favorably, are the most environmentally friendly, and are lightweight. They are currently used very often in screwdrivers.
The nominal voltage of the Ni-Cd cell is 1.2 V. The nickel-cadmium battery is charged with a current of 0.1 to 1.0 rated capacity. This means that a battery with a capacity of 5 ampere hours can be charged with a current of 0.5 to 5 A.
The charge of sulfuric acid batteries is well known to all people who hold a screwdriver in their hands, because almost all of them are also car enthusiasts. The nominal voltage of a Pb-PbO2 cell is 2.0 V, and the charging current of a lead sulfuric acid battery is always 0.1 C (a fraction of the current of the nominal capacity, see above).

The lithium-ion cell has a nominal voltage of 3.3 V. The charging current of a lithium-ion battery is 0.1 C. At room temperature, this current can be gradually increased to 1.0 C - this is a fast charge. However, this is only suitable for batteries that have not been over-discharged. When charging lithium-ion batteries, the voltage must be strictly observed. The charge is made up to 4.2 V exactly. Exceeding it sharply reduces service life, lowering it reduces capacity. When charging, monitor the temperature. A warm battery should either be limited by current to 0.1 C, or disconnected until it cools down.
ATTENTION! If a lithium-ion battery overheats when charging above 60 degrees Celsius, it may explode and catch fire! Do not rely too much on the built-in safety electronics (charge controller).
When charging a lithium battery, the control voltage (end of charge voltage) forms an approximate series (the exact voltages depend on the specific technology and are indicated in the battery passport and on its case):
The charging voltage should be monitored with a multimeter or a circuit with a voltage comparator tuned exactly to the battery used. But for “entry-level electronics engineers,” only a simple and reliable circuit, described in the next section, can really be offered.
The charger offered below provides the required charging current for any of the listed batteries. Screwdrivers are powered by batteries with different voltages of 12 volts or 18 volts. It doesn’t matter, the main parameter of a battery charger is the charge current. The voltage of the charger when the load is disconnected is always higher than the rated voltage; it drops to normal when the battery is connected during charging. During the charging process, it corresponds to the current state of the battery and is usually slightly higher than the nominal value at the end of charging.

The charger is a current generator using a powerful composite transistor VT2, which is powered by a rectifier bridge connected to a step-down transformer with sufficient output voltage (see table in the previous section).
This transformer must also have sufficient power to provide the required current during long-term operation without overheating the windings. Otherwise it may burn. The charge current is set by adjusting resistor R1 when the battery is connected. It remains constant during the charging process (the more constant the higher the voltage from the transformer. Note: the voltage from the transformer should not exceed 27 V).
Resistor R3 (at least 2 W 1 Ohm) limits the maximum current, and LED VD6 lights up while charging is in progress. Towards the end of the charge, the LED glow decreases and goes out. However, do not forget about precise control of lithium-ion battery voltage and temperature!
All parts in the described circuit are mounted on a printed circuit board made of foil PCB. Instead of the diodes indicated in the diagram, you can take Russian diodes KD202 or D242, they are quite available in old electronic scrap. The parts must be arranged so that there are as few intersections as possible on the board, ideally none. You should not get carried away with high installation density, because you are not assembling a smartphone. It will be much easier for you to solder the parts if there is 3-5 mm between them.
The transistor must be installed on a heat sink of sufficient area (20-50 cm2). It is best to mount all parts of the charger in a convenient homemade case. This will be the most practical solution; nothing will interfere with your work. But here there can be great difficulties with the terminals and connection to the battery. Therefore, it is better to do this: take an old or faulty charger from a friend that is suitable for your battery model, and remake it.
The assembled device will work reliably if you carefully and thoroughly
instrument-blog.ru
There is a screwdriver in every home where basic repairs are carried out. Any electrical appliance requires stationary electricity or a power supply. Since cordless screwdrivers are the most popular, a charger is also required. 
It comes complete with a drill, and like any electrical appliance it can fail. So that you do not encounter the problem of non-functioning equipment, we will study the general description of chargers for screwdrivers.
Their popularity is due to their low cost. If the drill (screwdriver) is not intended for professional use, the duration of operation is not the first issue. The task of a simple charger is to obtain a constant voltage with a current load sufficient to charge the battery.
This charging works on the principle of a conventional stabilizer. For example, consider a charger circuit for a 9-11 volt battery. The type of batteries does not matter.

You can assemble such a power supply (aka charger) with your own hands. You can solder the circuit on a universal circuit board. To dissipate the heat of the stabilizer chip, a copper radiator with an area of 20 cm² is sufficient.
Stabilizers of this type work on a compensation principle - excess energy is removed in the form of heat.
The input transformer (Tr1) reduces the 220 volt AC voltage to 20 volts. The power of the transformer is calculated by the current and voltage at the output of the charger. Next, the alternating current is rectified using a diode bridge VD1. Typically, manufacturers (especially Chinese) use an assembly of Schottky diodes.

After rectification, the current will pulsate, this is harmful to the normal functioning of the circuit. The ripples are smoothed out by a filtering electrolytic capacitor (C1).
The role of the stabilizer is performed by the KR142EN microcircuit, or “crank” in amateur radio slang. To obtain a voltage of 12 volts, the microcircuit index must be 8B. The control is assembled using a transistor (VT2) and trimming resistors.
Automation is not provided on such devices; the battery charging time is determined by the user. To control the charge, a simple circuit has been assembled using a transistor (VT1) and a diode (VD2). When the charging voltage is reached, the indicator (LED HL1) goes out.
More advanced systems include a switch that turns off the voltage at the end of the charge in the form of an electronic key.
Included with economy class screwdrivers (manufactured in the Middle Kingdom), there are also simpler chargers. It is no wonder that the failure rate is quite high. The owner faces the prospect of being left with a relatively new, inoperable screwdriver. Using the attached diagram, you can assemble a charger for a screwdriver with your own hands, which will last longer than the factory one. By changing the transformer and stabilizer, you can choose the required value for your battery.
The charger circuit itself is as primitive as possible. The kit includes an AC power supply and the charger itself, in a housing that holds the battery module.
There is no point in considering the power supply; its circuit is standard - a transformer, a diode bridge, a capacitor filter and a rectifier. The output is usually 18 volts, for classic 14 volt batteries.
The charge control board occupies the area of a matchbox:

As a rule, there is no heat sink on such assemblies, except perhaps a high-power load resistor. Therefore, such devices often fail. The question arises: how to charge a screwdriver without a charger?
The solution is simple for a person who knows how to hold a soldering iron.
Schematic diagram of the control unit: 
The input is a zener diode of 18 volts. The control circuit is based on the KT817 transistor; amplification is provided by the powerful KT818 transistor. It must be equipped with a radiator. Depending on the charging current, it can dissipate up to 10 W, so a radiator with an area of 30-40 cm² will be required.
It is the savings on matches that make Chinese chargers so unreliable. A 1 KOhm trimmer is needed to accurately set the charge current. The 4.7 ohm resistor at the output of the circuit should also dissipate enough heat. Power not less than 5 W. The LED indicator will notify you that the charge is complete and will go off.
The assembled circuit can be easily placed in the standard charging case. It is not necessary to remove the transistor heatsink; the main thing is to ensure air circulation inside the case.
The savings lie in the fact that the power supply from the laptop is still used for its intended purpose.
For a household screwdriver this is not a problem. I left it to charge overnight before starting work - it was enough to assemble the cabinet. The average charging time for a Chinese cordless drill is 3-5 hours.
Let's move on to heavy weapons. Professional screwdrivers are used intensively, and downtime due to a low battery is unacceptable. We leave out the price issue; any serious equipment is expensive. Moreover, the kit usually includes two batteries. While one is in work, the second is being recharged.
A switching power supply, complete with an intelligent charge control circuit, fills the battery 100% in literally 1 hour. You can also assemble an analog charger with the same power. But its weight and dimensions will be comparable to a screwdriver.
Pulse chargers do not have all these disadvantages. Compact size, high charge currents, thoughtful protection. There is only one problem: the complexity of the scheme, and as a result, the high price. However, it is possible to assemble such a device. Saving at least 2 times.
We offer an option for “advanced” nickel-cadmium batteries equipped with a third signal contact.
The circuit is assembled on the popular MAX713 controller. The proposed implementation is designed for an input voltage of 25 volts DC. It is not difficult to assemble such a power supply, so we omit its circuit diagram.

The charger is intelligent. After checking the voltage level, the accelerated discharge mode starts (to prevent the memory effect). Charging occurs in 1-1.15 hours. A special feature of the circuit is the ability to select the charging voltage and battery type. The description in the figure indicates the position of the jumpers and the value of resistor R19 for changing modes.
If the proprietary charger of a professional screwdriver fails, you can save on repairs by assembling the circuit yourself.
Many people are familiar with the situation: the screwdriver is alive and well, but the battery pack has died. There are many ways to restore a battery, but not everyone likes to tinker with toxic elements.
The answer is simple: connect an external power supply. If you have a typical Chinese device with 14.4 volt batteries, you can use a car battery (convenient for working in the garage). Or you can choose a transformer with an output of 15-17 volts and assemble a full-fledged power supply.

The set of parts is the most inexpensive. Rectifier (diode bridge) and thermostat to protect against overheating. The remaining elements have a service task - indicating input and output voltage. No stabilizer required - your screwdriver's electric motor is not as demanding as the battery.
As you can see, reviving a cordless drill is not that difficult. The main thing is not to make a hasty decision: “throw it away and buy a new electrical appliance”
If your screwdriver batteries are completely out of order, then you can convert it to mains power, see how to make such a power supply in this video
Here you can download the printed circuit board in lay format
This is what the charger conversion circuit looks like. 
obinstrumente.ru
All battery-powered screwdrivers are equipped with chargers. However, some of them charge the battery very slowly, which creates some inconvenience when using the tool intensively. In this case, even the two batteries included in the kit do not allow you to set up a normal operating cycle. The best way out of this situation would be a self-made charger for a screwdriver, according to the most suitable scheme.
Despite the variety of models, the general design of screwdrivers is quite universal, and the principle of operation is almost the same. They may differ only in appearance, arrangement of individual parts, and the presence or absence of additional functions.

The power supply for screwdrivers can be 220V or battery powered. The general design of a screwdriver includes the following elements and components:
An important component is the rotation control clutch, which sets a certain torque. With its help, the rotation of the shaft stops after screwing in the screw. The stoppage occurs due to an increase in rotational resistance. This measure prevents breakage of the threaded part of the screw and failure of the screwdriver itself.
The same screwdrivers can use different types of batteries, differing in parameters and technical characteristics. Due to this, they require different chargers. Therefore, before purchasing or making a charger for a screwdriver with your own hands, you need to determine the type of battery and operating conditions. In addition, it is recommended to study the basic circuits most often used in chargers.

Charging on a microcontroller. It is housed in a regular housing and is equipped with sound and light signaling for the start and end of charging. This circuit ensures correct battery charging. At the beginning of operation, the LEDs light up and then go out. The indication is accompanied by a sound signal. In this way, the device's functionality is tested. After this, the red LED begins to blink evenly, indicating normal charging.
When the battery reaches full charge, the red LED stops blinking and instead the green LED lights up, accompanied by a sound signal. This means charging is complete.
Setting the voltage level that should be when fully charged is done using a variable resistor. In this case, the input voltage value is equal to the voltage of a fully charged battery plus one volt. The circuit uses any field-effect transistor that has a P-channel and is most suitable in terms of current characteristics.

In order to ensure charging at a level of 14V, the voltage supplied to the input must be at least 15-16V. The response threshold that turns off the charger is set using a variable resistor at 14.4V. The charging process itself occurs in the form of pulses displayed on the LED. In the intervals between pulses, the voltage on the battery is monitored and when the desired value is reached, a sound signal is given along with the blinking of the LED indicating the end of charging.
There are other charger schemes. For example, a charger for a drill-driver operates with a voltage of 18 volts. When charging a battery at 14.4V, the charging current is selected using a resistor.
The problem of making a charger yourself does not arise very often, due to the large number of options suitable for almost all models of screwdrivers. It’s just that sometimes situations arise when the charger is missing, or it suddenly fails, and there is no way to purchase a new one. In this case, you can try to make a charger yourself.

You should first stock up on all the necessary materials. You will need a non-working battery, a battery cup, a soldering iron, a hot-melt gun, a regular Phillips screwdriver, a drill and a sharp knife with replaceable blades. After this, you can begin making the charger. First of all, the charging cup is opened, after which all conductors are unsoldered from the terminals. Next, the internal electronics are removed. When performing this operation, the polarity of the terminals must be observed to avoid confusion and errors in the future.
The case of a non-working battery must be opened and the wires carefully unsoldered from the terminals. For further work you will need a connector and a top cover. Plus and minus on the terminals are marked with a pencil or marker. At the base of the charging cup, holes are marked through which the prepared lid and the terminals of the supply wires will be attached. The conductors are carefully passed through the holes, observing polarity, after which they are connected to the terminals and connectors by soldering.

Next, the body needs to be fastened with special hot-melt adhesive; the bottom cover is attached to the base of the glass using self-tapping screws. The resulting structure must be inserted into the battery and the charging process begins. A flashing indicator will indicate that the device is assembled correctly. Only a few chargers are equipped with so-called smart systems that significantly extend the battery life. An 18-volt screwdriver charger can solve this problem.
A voltage stabilization system and charging current limitation are added to the design of conventional charging. The result is a nickel-cadmium battery design with a capacity of 1200 mAh. Charging will be performed in a safe mode, with a maximum current of no higher than 120 mA, but it will take more time than usual.
electric-220.ru
No repair is complete without a drill. This electrical device is powered by mains or battery. If you choose a cordless drill for work, you will also need a charger for it. It is sold complete with the device. However, such an element sooner or later fails. To avoid an unfortunate circumstance, you should study the design capabilities and description of the chargers. It is especially worth getting acquainted with the circuit diagram of the drill-driver charger. This will help you know how to repair it correctly.

There are many types of devices for charging cordless drills. They differ in price, operating principle and repair features. Each type of screwdriver should be considered in more detail.
Such devices are quite popular due to their low cost. If the drill will not be used for professional purposes, you should not focus on the duration of work. The main condition that the simplest charger must meet is that it must provide a sufficient current load to charge the screwdriver battery.

Important! To start charging, it is necessary that the voltage at the output of the power supply is higher than the nominal value of the device battery.
The operation of an analog device with a power supply is quite simple. This charger is used as a stabilizer. For example, you need to consider the charger circuit for a battery from 9 to 11 V. It does not matter what type of battery is used. Cordless drills and screwdrivers are quite common among home craftsmen, so knowledge of the features of their repair will be useful to everyone.

Many home craftsmen assemble this power supply with their own hands. Soldering the circuit can only be done on a universal board. To ensure heat dissipation of the stabilizer chip, it is necessary to find a copper radiator of 20 square meters. cm area.
Attention! Stabilizers are operated according to the compensation principle. Excess energy can be removed in the form of heat.
Thanks to the output transformer, the alternating voltage is reduced from 220 V to 20 V. You can calculate what the power of the transformer will be based on the voltage current at the charging output. AC rectification is carried out by a diode bridge.

After rectification, the current turns out to be pulsating. However, this feature of the current negatively affects the functioning of the circuit. Ripple can be smoothed out using a filter capacitor (C1). The KR 142EN microcircuit is used as a stabilizer. Radio amateurs call it “krenka”. To get a voltage of 12 V, you must have a microcircuit with index 8B. The control is assembled on transistor VT2. In addition, trimming resistors are used. Automation is not installed on such devices. How long the battery will take to charge depends on the user. To control the charge, a fairly simple circuit is assembled using transistor VT1. The circuit also contains diode VD2. When the charging voltage is reached, the indicator goes out.
More modern systems have a switch. Thanks to it, the voltage is turned off at the end of the charge. When you buy a cheap screwdriver, it comes with a simple charger. This explains why such devices break down very often. When purchasing such a screwdriver, the consumer risks being left with a new, but non-working device. However, the charger is easy to assemble with your own hands. The main thing is to have a plan.

A homemade device can last much longer than a purchased one. To select the battery value of a drill-driver, you will need to experimentally configure the transformer and stabilizer.
The charger circuit itself is quite simple. This device comes with a power supply and a charger. It makes no sense to inspect the power supply. Its design is standard. It includes a diode bridge, transformer, rectifier and capacitor filter. Typically the output is 18V.
Control is carried out using a small board, which has the size of a matchbox. Such assemblies do not have a heat removal system. For this reason, such devices quickly fail. Therefore, users are often interested in how to charge a cordless drill/driver without a charger.
You can solve this problem quite simply:
The control unit must have a diagram as in the photo:

An 18 V zener diode is installed at the input. The circuit that will control the charger operates on a KT817 transistor. To provide amplification, a KT818 transistor is installed. At the same time, it is equipped with a radiator for heat removal. Depending on the charging current, it can dissipate up to 10 W. It is necessary that the radiator has the required area - from 30 to 40 square meters. cm.
The unreliability of Chinese batteries is explained by the manufacturers' savings on matches. To set the exact charge current, you should have a 1 Kom trimmer. A 4.7 Ohm resistor is installed at the output. It should also provide sufficient heat dissipation. The output power does not exceed 5W.

The assembled circuit is quite simply placed in the standard charging case. The radiator does not have to be removed. The main thing is that there is sufficient air circulation inside the case. The power supply from the laptop is still used according to its intended purpose.
Important! One of the main disadvantages of analog chargers is the long charging process. In the case of a household cordless drill/driver, this is not a problem. It is enough for simple work. It is enough to charge it the night before work. A simple Chinese battery in a screwdriver usually lasts from 3 to 5 hours of operation.

Professional screwdrivers are designed for intensive use. Therefore, downtime during work is unacceptable. It is worth remembering that every serious device has a high price. Therefore, the price issue should be omitted. In addition, the kit usually includes 2 batteries.
The switching power supply is complemented by a “smart” control circuit. Thanks to this, the battery is charged to 100% in just an hour. You can build the same analog-type charger with your own hands. However, its dimensions will be equal to the dimensions of the screwdriver itself.

Pulse devices are good because they do not have many disadvantages. They are quite compact, have high charge currents and are equipped with a sophisticated protection system. There is only one problem - the circuitry of such devices is quite complex, which affects the cost of the device.
However, even such a device can be built on your own. The savings are approximately 2 times.
It is worth considering the option for nickel-cadmium batteries, which are equipped with a third signal contact. The circuit diagram of the device on the MAX713 is being assembled. This controller is quite popular. The output voltage will be 25 V. The current will be constant. Assembling such a power source is quite simple.

The charger is equipped with several features that make it smart. After the voltage level has been checked, it is necessary to start the accelerated discharge mode. This will prevent memory effect. The charge is carried out in one and a half hours. The main distinguishing feature of the circuit is the ability to select the type of battery and charge voltage.
With the release of a branded charger for a professional device, you can save a lot on repairing the charger for a screwdriver. The circuit can be assembled independently.

Quite often, owners of drills and screwdrivers are faced with a situation where the device itself is working properly, but the battery pack is faulty. There are many ways to solve this problem. However, not everyone will work with toxic parts.
To continue working with the screwdriver, you must connect an external power supply. If you have a standard Chinese device with 14.4 V batteries, you can use a car battery. However, there is another option - to find a transformer with an output voltage of 15-17 V in order to assemble a full-fledged power supply.

The necessary parts are inexpensive. First of all, you will need a thermostat and a diode bridge. Other design elements perform service functions - display input and output voltage. There is no need to purchase a stabilizer. This is explained by the undemanding nature of the screwdriver motor.
As you can see, assembling the charger for a cordless drill is quite simple. The main thing is not to decide to immediately throw away an electrical appliance. If the batteries completely fail, the device can be converted to use a network one. This type of work also has many subtleties that you should become familiar with.

To build your own charger for a screwdriver, you will need to know the diagram of such a device and the characteristics of the main parts. The assembly process itself is quite simple. The main thing is to be able to work with a soldering iron.
Even if the power supply of a professional model of a screwdriver fails, it can be turned into a network one. If you decide to repair the device yourself, you don’t have to worry about the price of parts - they cost pennies on the radio market. Knowing these features of repairing cordless screwdrivers will help you do the job yourself.
While using a cheap Chinese screwdriver, recently purchased, it was discovered that the standard charger was weak. Accordingly, I needed a charger circuit for a screwdriver that would work stably. And the native Chinese charger charged slowly at low voltage and got very hot when connected to a higher voltage of 220V.
To assemble a homemade charger for my instrument, I used a circuit that had already been tested many times, the heart of which was the KT829 composite transistor. This design has already been used in practice by many people.
Depending on the voltage on the battery, the charging current passing through it is regulated by KT361, the collector voltage of the transistor controls the charge indicator, and KT361 itself controls the operation of the composite transistor. The LED lights up during charging, and as the charging current decreases, the LED gradually goes out.
The maximum charging current is limited by a resistor with a resistance of 1 ohm. The required voltage on the battery determines the moment when the charge is full, the process is completed, and the charging current decreases to zero. The variable resistor sets the charge threshold and after adjustment, it is then replaced with a constant resistor of the required resistance. The charge threshold itself needs to be set slightly higher, the value that ensures maximum charging of the capacity.

In addition to transistors, of course, any charger circuit for a screwdriver contains a transformer. In this case, a transformer was used in the secondary winding of which the voltage is 9 volts and the current is 1A, brand - TP-20-14. This transformer was removed from an old “Electronics-409” black-and-white small-format TV. You can find a similar transformer by picking it out from another representative of the “TV and radio dinosaurs”.

So, now all that remains is to carefully mount the finished device for charging the screwdriver into any plastic case with suitable dimensions. The improved screwdriver charger circuit presented in this article is reliable and works very well. A year of operation without failures demonstrated the absence of shortcomings; all this time, the screwdriver from this device was charged reliably and quickly.
 Correct connection diagram for a single-phase meter
Using a power tool greatly facilitates our work and reduces assembly time. Currently, battery-powered screwdrivers have become very popular. In this article, we will consider the diagram of a typical charger for a screwdriver, as well as repair tips and options for amateur radio designs.


The power part of the screwdriver charger is a GS-1415 type power transformer designed for a power of 25 Watts.
A reduced alternating voltage with a nominal value of 18V is removed from the secondary winding of the transformer; it follows diode bridge of 4 diodes VD1-VD4 type 1N5408, via a fuse. Diode bridge. Each 1N5408 semiconductor element is rated for forward current up to three amperes. Electrolytic capacitance C1 smoothes out ripples appearing in the circuit after the diode bridge.
Control is implemented on a micro-assembly HCF4060BE. which combines a 14-bit counter with master oscillator components. It controls a bipolar transistor type S9012. It is loaded with relay type S3-12A. In this way, a timer is implemented in the circuitry, turning on the relay for about an hour to charge the battery. When the charger is turned on and the battery is connected, the relay contacts are in the normally open position. The HCF4060BE receives power through a 12-volt zener diode 1N4742A, since the output of the rectifier is about 24 volts.
When the “Start” button is closed, the voltage from the rectifier begins to flow to the zener diode through resistance R6, then the stabilized voltage goes to pin 16 of U1. Transistor S9012 opens, which is controlled by the HCF4060BE. The voltage through the open junctions of transistor S9012 goes to the relay winding. The contacts of the latter close and the battery begins to charge. The protective diode VD8 (1N4007) bypasses the relay and protects VT from a reverse voltage surge that occurs when the relay winding is de-energized. VD5 prevents the battery from being discharged when the mains voltage is turned off. When the contacts of the “Start” button are opened, nothing will happen because the power goes through the diode VD7 (1N4007), the zener diode VD6 and the quenching resistor R6. Therefore, the chip will receive power even after the button is released.
Replaceable typical battery from a power tool, assembled from individual series-connected nickel-cadmium Ni-Cd batteries, each 1.2 volts, so there are 12 of them. The total voltage of such a battery will be about 14.4 volts. In addition, a temperature sensor has been added to the battery pack - SA1, it is glued to one of the Ni-Cd batteries and fits tightly to it. One of the thermostat terminals is connected to the battery negative. The second pin is connected to a separate, third connector.
When you press the “Start” button, the relay closes its contacts and the battery charging process begins. The red LED lights up. An hour later, the relay with its contacts breaks the battery charging circuit of the screwdriver. The green LED lights up and the red LED goes out.
The thermal contact monitors the battery temperature and breaks the charging circuit if the temperature is above 45°. If this happens before the timer circuit works, this indicates the presence of a “memory effect”.
Over time, due to wear and tear, the “Start” button works poorly, and sometimes does not work at all. Also in my practice, the 1N4742A zener diode and HCF4060BE microcircuits failed. If the charger circuit is in good working order and does not raise any suspicions, and charging does not start, then you need to check the thermal switch in the battery pack by carefully disassembling it.
Charger for screwdriver batteries on KR142EN12A
The basis of the design is an adjustable positive voltage stabilizer. It allows operation with a load current of up to 1.5A, which is quite enough to charge batteries.
An alternating voltage of 13V is removed from the secondary winding of the transformer and rectified by a D3SBA40 diode bridge. At its output there is a filter capacitor C1, which reduces the ripple of the rectified voltage. From the rectifier, direct voltage is supplied to the integrated stabilizer, the output voltage of which is set by the resistance of resistor R4 at 14.1V (Depends on the type of screwdriver battery). The charging current sensor is resistance R3, in parallel with which a tuning resistance R2 is connected; using this resistance, the charging current level is set, which corresponds to 0.1 of the battery capacity. At the first stage, the battery is charged with a stable current, then, when the charging current becomes less than the limiting current, the battery will be charged with a lower current to the stabilization voltage DA1.

The charging current sensor for LED HL1 is VD2. In this case, HL1 will indicate a current of up to 50 milliamps. If you use R3 as a current sensor, the LED will go out at a current of 0.6A, which would be too early. The battery would not have time to charge. This device can also be used for six-volt batteries.
Charger for nickel batteries of a screwdriver on a microcontroller
The amateur radio design is used to discharge and charge NiCd batteries with a capacity of 1.2 Ah. At its core, it is an improved standard screwdriver charger, into which a circuit is introduced that controls the additional discharge and subsequent charge of the battery. After connecting the battery to the charger, the process of discharging the battery with a current of 120 mA to a voltage of 10 V starts, then the battery begins to charge with a current of 400 mA. Charging stops when the voltage on the screwdriver battery reaches 15.2 V or according to a timer after 3.5 hours (programmed in the MK firmware).
During discharge, HL1 is constantly lit. During charging, the HL2 LED lights up and HL1 blinks at intervals of 5 seconds. After the battery has finished charging, upon reaching the upper voltage level, HL1 begins to blink frequently (2 blinks with a pause of 600 ms). If the charge has stopped due to the timer, then HL1 blinks once every 600 ms. If the supply voltage disappears during charging, the timer stops. And the PIC12F675 microcontroller receives power from the battery, through a diode, inside the VT2 transistor. Firmware for MK from the link above.


Without a doubt, power tools greatly facilitate our work and also reduce the time of routine operations. All kinds of self-powered screwdrivers are now in use. Let's consider the device, circuit diagram and repair of a charger for batteries from a screwdriver from the Interskol9 company.
First, let's take a look at the circuit diagram. It is copied from a real charger circuit board.

Charger circuit board (CDQ-F06K1).

The power part of the charger consists of a GS-1415 power transformer. Its power is about 25-26 watts. I calculated using the simplified formula that I already discussed here.

A reduced alternating voltage of 18V from the secondary winding of the transformer is supplied to the diode bridge through fuse FU1. The diode bridge consists of 4 diodes VD1-VD4 type 1N5408. Each of the 1N5408 diodes can withstand a forward current of 3 amperes. Electrolytic capacitor C1 smoothes out voltage ripples after the diode bridge.
The basis of the control circuit is a microcircuit HCF4060BE. which is a 14-bit counter with elements for the master oscillator. It controls the pnp bipolar transistor S9012. The transistor is loaded onto the electromagnetic relay S3-12A. The U1 chip implements a kind of timer that turns on the relay for a given charging time - about 60 minutes.
When the charger is plugged in and the battery is connected, the JDQK1 relay contacts are open.
The HCF4060BE chip is powered by a zener diode VD6 - 1N4742A(12V). The zener diode limits the voltage from the mains rectifier to 12 volts, since its output is about 24 volts.
If you look at the diagram, it is not difficult to notice that before pressing the “Start” button, the U1 HCF4060BE chip is de-energized - disconnected from the power source. When you press the “Start” button, the supply voltage from the rectifier is supplied to the 1N4742A zener diode through resistor R6.
The supply voltage through the open transistor S9012 is supplied to the winding of the electromagnetic relay JDQK1. The relay contacts close and power supply is supplied to the battery. The battery begins to charge. Diode VD8 ( 1N4007) bypasses the relay and protects transistor S9012 from a reverse voltage surge that is formed when the relay winding is de-energized.
The VD5 diode (1N5408) protects the battery from discharge if the mains power is suddenly turned off.
What happens after the contacts of the “Start9” button open? The diagram shows that when the contacts of the electromagnetic relay are closed, the positive voltage through the diode VD7 ( 1N4007) is supplied to the zener diode VD6 through the quenching resistor R6. As a result, the U1 chip remains connected to the power source even after the button contacts are open.
The GB1 replacement battery is a unit in which 12 nickel-cadmium (Ni-Cd) cells, each 1.2 volts, are connected in series.

In the schematic diagram, the elements of a replaceable battery are outlined with a dotted line.
The total voltage of such a composite battery is 14.4 volts.

There is also a temperature sensor built into the battery pack. In the diagram it is designated as SA1. Its operating principle is similar to the KSD series thermal switches. Thermal switch marking JJD-45 2A. Structurally, it is fixed to one of the Ni-Cd elements and fits tightly to it.

One of the terminals of the temperature sensor is connected to the negative terminal of the battery. The second pin is connected to a separate, third connector.
When plugged into a 220V network, the charger does not show its operation in any way. The indicators (green and red LEDs) do not light up. When a replacement battery is connected, the green LED lights up, indicating that the charger is ready for use.
When you press the “Start” button, the electromagnetic relay closes its contacts and the battery is connected to the output of the mains rectifier, and the battery charging process begins. The red LED lights up and the green LED goes out. After 50 - 60 minutes, the relay opens the battery charging circuit. The green LED lights up and the red LED goes out. Charging is complete.
After charging, the voltage at the battery terminals can reach 16.8 volts.
This operating algorithm is primitive and over time leads to the so-called “memory effect” of the battery. That is, the battery capacity decreases.
If you follow the correct battery charging algorithm, first each of its elements must be discharged to 1 volt. Those. A block of 12 batteries needs to be discharged to 12 volts. The charger for a screwdriver has this mode: not implemented .
Here is the charging characteristic of one Ni-Cd battery cell at 1.2V.

The graph shows how the cell temperature changes during charging ( temperature), voltage at its terminals ( voltage) and relative pressure ( relative pressure).
Specialized charge controllers for Ni-Cd and Ni-MH batteries, as a rule, operate according to the so-called delta -V method. The figure shows that at the end of charging the element, the voltage decreases by a small amount - about 10mV (for Ni-Cd) and 4mV (for Ni-MH). Based on this change in voltage, the controller determines whether the element is charged.
Also, during charging, the temperature of the element is monitored using a temperature sensor. The graph also shows that the temperature of the charged element is about 45 0 WITH.
Let's return to the circuit diagram of the charger from the screwdriver. It is now clear that the JDD-45 thermal switch monitors the temperature of the battery pack and breaks the charging circuit when the temperature reaches somewhere 45 0 C. Sometimes this happens before the timer on the HCF4060BE chip works. This happens when the battery capacity has decreased due to the “memory effect”. At the same time, such a battery is fully charged a little faster than in 60 minutes.
As we can see from the circuit design, the charging algorithm is not the most optimal and over time leads to a loss of battery capacity. Therefore, you can use a universal charger to charge the battery. for example, such as Turnigy Accucell 6.
Over time, due to wear and humidity, the SK1 “Start9” button begins to work poorly, and sometimes even fails. It is clear that if the SK1 button malfunctions, we will not be able to supply power to the U1 chip and start the timer.
Failure of the zener diode VD6 (1N4742A) and microcircuit U1 (HCF4060BE) may also occur.
If the elements of the printed circuit board are in good working order and do not raise suspicions, and the charging mode does not turn on, then you should check the thermal switch SA1 (JDD-45 2A) in the battery pack.
The circuit is quite primitive and does not cause problems in diagnosing faults and repairs even for novice radio amateurs.
Often the original charger included with the screwdriver works slowly, taking a long time to charge the battery. For those who intensively use a screwdriver, this greatly interferes with their work. Despite the fact that the kit usually includes two batteries (one installed in the tool handle and in use, and the other connected to the charger and in the process of charging), owners often cannot adapt to the operating cycle of the batteries. Then it makes sense to make a charger yourself and charging will become more convenient.


Batteries are of different types and their charging modes may be different. Nickel-cadmium (Ni-Cd) batteries are a very good source of energy and are capable of delivering high power. However, for environmental reasons their production has ceased and they will become less and less common. Now they have been replaced everywhere by lithium-ion batteries.
Sulfuric acid (Pb) lead gel batteries have good characteristics, but they make the tool heavier and therefore are not very popular, despite their relative cheapness. Since they are gel (the sulfuric acid solution is thickened with sodium silicate), there are no plugs in them, the electrolyte does not leak out of them, and they can be used in any position. (By the way, nickel-cadmium batteries for screwdrivers also belong to the gel class.)
Lithium-ion batteries (Li-ion) are now the most promising and promoted in technology and on the market. Their feature is the complete sealing of the cell. They have a very high power density, are safe to use (thanks to the built-in charge controller!), can be disposed of favorably, are the most environmentally friendly, and are lightweight. They are currently used very often in screwdrivers.
The nominal voltage of the Ni-Cd cell is 1.2 V. The nickel-cadmium battery is charged with a current of 0.1 to 1.0 rated capacity. This means that a battery with a capacity of 5 ampere hours can be charged with a current of 0.5 to 5 A.
The charge of sulfuric acid batteries is well known to all people who hold a screwdriver in their hands, because almost all of them are also car enthusiasts. The nominal voltage of a Pb-PbO2 cell is 2.0 V, and the charging current of a lead sulfuric acid battery is always 0.1 C (a fraction of the current of the nominal capacity, see above).

The lithium-ion cell has a nominal voltage of 3.3 V. The charging current of a lithium-ion battery is 0.1 C. At room temperature, this current can be gradually increased to 1.0 C - this is a fast charge. However, this is only suitable for batteries that have not been over-discharged. When charging lithium-ion batteries, the voltage must be strictly observed. The charge is made up to 4.2 V exactly. Exceeding it sharply reduces service life, lowering it reduces capacity. When charging, monitor the temperature. A warm battery should either be limited by current to 0.1 C, or disconnected until it cools down.
ATTENTION! If a lithium-ion battery overheats when charging above 60 degrees Celsius, it may explode and catch fire! Do not rely too much on the built-in safety electronics (charge controller).
When charging a lithium battery, the control voltage (end of charge voltage) forms an approximate series (the exact voltages depend on the specific technology and are indicated in the battery passport and on its case):
The charging voltage should be monitored with a multimeter or a circuit with a voltage comparator tuned exactly to the battery used. But for “entry-level electronics engineers,” only a simple and reliable circuit, described in the next section, can really be offered.
The charger offered below provides the required charging current for any of the listed batteries. Screwdrivers are powered by batteries with different voltages of 12 volts or 18 volts. It doesn’t matter, the main parameter of a battery charger is the charge current. The voltage of the charger when the load is disconnected is always higher than the rated voltage; it drops to normal when the battery is connected during charging. During the charging process, it corresponds to the current state of the battery and is usually slightly higher than the nominal value at the end of charging.

The charger is a current generator using a powerful composite transistor VT2, which is powered by a rectifier bridge connected to a step-down transformer with sufficient output voltage (see table in the previous section).
This transformer must also have sufficient power to provide the required current during long-term operation without overheating the windings. Otherwise it may burn. The charge current is set by adjusting resistor R1 when the battery is connected. It remains constant during the charging process (the more constant the higher the voltage from the transformer. Note: the voltage from the transformer should not exceed 27 V).
Resistor R3 (at least 2 W 1 Ohm) limits the maximum current, and LED VD6 lights up while charging is in progress. Towards the end of the charge, the LED glow decreases and goes out. However, do not forget about precise control of lithium-ion battery voltage and temperature!
All parts in the described circuit are mounted on a printed circuit board made of foil PCB. Instead of the diodes indicated in the diagram, you can take Russian diodes KD202 or D242, they are quite available in old electronic scrap. The parts must be arranged so that there are as few intersections as possible on the board, ideally none. You should not get carried away with high installation density, because you are not assembling a smartphone. It will be much easier for you to solder the parts if there is 3-5 mm between them.
The transistor must be installed on a heat sink of sufficient area (20-50 cm2). It is best to mount all parts of the charger in a convenient homemade case. This will be the most practical solution; nothing will interfere with your work. But here there can be great difficulties with the terminals and connection to the battery. Therefore, it is better to do this: take an old or faulty charger from a friend that is suitable for your battery model, and remake it.
There is a screwdriver in every home where basic repairs are carried out. Any electrical appliance requires stationary electricity or a power supply. Since cordless screwdrivers are the most popular, a charger is also required.

It comes complete with a drill, and like any electrical appliance it can fail. So that you do not encounter the problem of non-functioning equipment, we will study the general description of chargers for screwdrivers.
Their popularity is due to their low cost. If the drill (screwdriver) is not intended for professional use, operating time is not the first issue. The task of a simple charger is to obtain a constant voltage with a current load sufficient to charge the battery.
Important! To start charging, the voltage at the output of the power supply must be higher than the nominal value of the battery.
This charging works on the principle of a conventional stabilizer. For example, consider a charger circuit for a 9-11 volt battery. The type of batteries does not matter.

You can assemble such a power supply (aka charger) with your own hands. You can solder the circuit on a universal circuit board. To dissipate the heat of the stabilizer chip, a copper radiator with an area of 20 cm² is sufficient.
For information: Stabilizers of this type work on a compensation principle - excess energy is removed in the form of heat.
The input transformer (Tr1) reduces the 220 volt AC voltage to 20 volts. The power of the transformer is calculated by the current and voltage at the output of the charger. Next, the alternating current is rectified using a diode bridge VD1. Typically, manufacturers (especially Chinese) use an assembly of Schottky diodes.

After rectification, the current will pulsate, this is harmful to the normal functioning of the circuit. The ripples are smoothed out by a filtering electrolytic capacitor (C1).
The role of the stabilizer is performed by the KR142EN microcircuit, or “crank” in amateur radio slang. To obtain a voltage of 12 volts, the microcircuit index must be 8B. The control is assembled using a transistor (VT2) and trimming resistors.
Automation is not provided on such devices; the battery charging time is determined by the user. To control the charge, a simple circuit has been assembled using a transistor (VT1) and a diode (VD2). When the charging voltage is reached, the indicator (LED HL1) goes out.
More advanced systems include a switch that turns off the voltage at the end of the charge in the form of an electronic key.
Included with economy class screwdrivers (manufactured in the Middle Kingdom), there are also simpler chargers. It is no wonder that the failure rate is quite high. The owner faces the prospect of being left with a relatively new, inoperable screwdriver. Using the attached diagram, you can assemble a charger for a screwdriver with your own hands, which will last longer than the factory one. By changing the transformer and stabilizer, you can choose the required value for your battery.
The charger circuit itself is as primitive as possible. The kit includes an AC power supply and the charger itself, in a housing that holds the battery module.

There is no point in considering the power supply; its circuit is standard - a transformer, a diode bridge, a capacitor filter and a rectifier. The output is usually 18 volts, for classic 14 volt batteries.
The charge control board occupies the area of a matchbox:

As a rule, there is no heat sink on such assemblies, except perhaps a high-power load resistor. Therefore, such devices often fail. The question arises: how to charge a screwdriver without a charger?
The solution is simple for a person who knows how to hold a soldering iron.
Schematic diagram of the control unit: 
The input is a zener diode of 18 volts. The control circuit is based on the KT817 transistor; amplification is provided by the powerful KT818 transistor. It must be equipped with a radiator. Depending on the charging current, it can dissipate up to 10 W, so a radiator with an area of 30-40 cm² will be required.
It is the savings on matches that make Chinese chargers so unreliable. A 1 KOhm trimmer is needed to accurately set the charge current. The 4.7 ohm resistor at the output of the circuit should also dissipate enough heat. Power not less than 5 W. The LED indicator will notify you that the charge is complete and will go off.
The assembled circuit can be easily placed in the standard charging case. It is not necessary to remove the transistor heatsink; the main thing is to ensure air circulation inside the case.
The savings lie in the fact that the power supply from the laptop is still used for its intended purpose.
Important! A common disadvantage of analog chargers is the long charging process.
For a household screwdriver this is not a problem. I left it to charge overnight before starting work - it was enough to assemble the cabinet. The average charging time for a Chinese cordless drill is 3-5 hours.
Let's move on to heavy weapons. Professional screwdrivers are used intensively, and downtime due to a low battery is unacceptable. We leave out the price issue; any serious equipment is expensive. Moreover, the kit usually includes two batteries. While one is in work, the second is being recharged.
A switching power supply, complete with an intelligent charge control circuit, fills the battery 100% in literally 1 hour. You can also assemble an analog charger with the same power. But its weight and dimensions will be comparable to a screwdriver.
Pulse chargers do not have all these disadvantages. Compact size, high charge currents, thoughtful protection. There is only one problem: the complexity of the scheme, and as a result, the high price.
However, it is possible to assemble such a device. Saving at least 2 times.
We offer an option for “advanced” nickel-cadmium batteries equipped with a third signal contact.
The circuit is assembled on the popular MAX713 controller. The proposed implementation is designed for an input voltage of 25 volts DC. It is not difficult to assemble such a power supply, so we omit its circuit diagram.

The charger is intelligent. After checking the voltage level, the accelerated discharge mode starts (to prevent the memory effect). Charging occurs in 1-1.15 hours. A special feature of the circuit is the ability to select the charging voltage and battery type. The description in the figure indicates the position of the jumpers and the value of resistor R19 for changing modes.
If the proprietary charger of a professional screwdriver fails, you can save on repairs by assembling the circuit yourself.
Many people are familiar with the situation: the screwdriver is alive and well, but the battery pack has died. There are many ways to restore a battery, but not everyone likes to tinker with toxic elements.
The answer is simple: connect an external power supply. If you have a typical Chinese device with 14.4 volt batteries, you can use a car battery (convenient for working in the garage). Or you can choose a transformer with an output of 15-17 volts and assemble a full-fledged power supply.

The set of parts is the most inexpensive. Rectifier (diode bridge) and thermostat to protect against overheating. The remaining elements have a service task - indicating input and output voltage. No stabilizer required - your screwdriver's electric motor is not as demanding as the battery.
As you can see, reviving a cordless drill is not that difficult. The main thing is not to make a hasty decision: “throw it away and buy a new electrical appliance”
If your screwdriver batteries are completely out of order, then you can convert it to mains power, see how to make such a power supply in this video
This is what the charger conversion circuit looks like. 
Using a power tool greatly facilitates our work and reduces assembly time. Currently, battery-powered screwdrivers have become very popular. In this article, we will consider the diagram of a typical charger for a screwdriver, as well as repair tips and options for amateur radio designs.
The power part of the screwdriver charger is a GS-1415 type power transformer designed for a power of 25 Watts.

A reduced alternating voltage with a nominal value of 18V is removed from the secondary winding of the transformer; it follows 4 diodes VD1-VD4 type 1N5408, through a fuse. Diode bridge. Each 1N5408 semiconductor element is rated for forward current up to three amperes. Electrolytic capacitance C1 smoothes out ripples appearing in the circuit after the diode bridge.
Control is implemented on a micro-assembly HCF4060BE, which combines a 14-bit counter with master oscillator components. It controls type S9012. It is loaded with relay type S3-12A. In this way, a timer is implemented in the circuitry, turning on the relay for about an hour to charge the battery. When the charger is turned on and the battery is connected, the relay contacts are in the normally open position. The HCF4060BE receives power through the 1N4742A at 12 volts, since the output of the rectifier is about 24 volts.
When the "Start" button is closed, the voltage from the rectifier begins to flow to the zener diode through resistance R6, then the stabilized voltage goes to pin 16 of U1. Transistor S9012 opens, which is controlled by the HCF4060BE. The voltage through the open junctions of transistor S9012 goes to the relay winding. The contacts of the latter close and the battery begins to charge. The protective diode VD8 (1N4007) bypasses the relay and protects VT from a reverse voltage surge that occurs when the relay winding is de-energized. VD5 prevents the battery from being discharged when the mains voltage is turned off. When the contacts of the "Start" button are opened, nothing will happen because the power goes through the diode VD7 (1N4007), the zener diode VD6 and the quenching resistor R6. Therefore, the chip will receive power even after the button is released.
Replaceable typical battery from a power tool, assembled from individual series-connected nickel-cadmium Ni-Cd batteries, each 1.2 volts, so there are 12 of them. The total voltage of such a battery will be about 14.4 volts. In addition, a temperature sensor has been added to the battery pack - SA1, it is glued to one of the Ni-Cd batteries and fits tightly to it. One of the thermostat terminals is connected to the battery negative. The second pin is connected to a separate, third connector.
When you press the "Start" button, the relay closes its contacts and the battery charging process begins. The red LED lights up. An hour later, the relay with its contacts breaks the battery charging circuit of the screwdriver. The green LED lights up and the red LED goes out.
The thermal contact monitors the battery temperature and breaks the charging circuit if the temperature is above 45°. If this happens before it works, this indicates the presence of a “memory effect”.
The basis of the design is an adjustable positive voltage stabilizer. It allows operation with a load current of up to 1.5A, which is quite enough to charge batteries.

An alternating voltage of 13V is removed from the secondary winding of the transformer and rectified by a D3SBA40 diode bridge. At its output there is a filter capacitor C1, which reduces the ripple of the rectified voltage. From the rectifier, direct voltage is supplied to the integrated stabilizer, the output voltage of which is set by the resistance of resistor R4 at 14.1V (Depends on the type of screwdriver battery). The charging current sensor is resistance R3, in parallel with which a tuning resistance R2 is connected; using this resistance, the charging current level is set, which corresponds to 0.1 of the battery capacity. At the first stage, the battery is charged with a stable current, then, when the charging current becomes less than the limiting current, the battery will be charged with a lower current to the stabilization voltage DA1.

The charging current sensor for LED HL1 is VD2. In this case, HL1 will indicate a current of up to 50 milliamps. If you use R3 as a current sensor, the LED will go out at a current of 0.6A, which would be too early. The battery would not have time to charge. This device can also be used for six-volt batteries.


