Recovering files from a hard drive is an issue that worries many personal computer owners.
This includes the loss of valuable information and the time required for its successful recovery.
Specialized services charge a lot of money for this, but if the media is in good condition, it makes sense to try to recover the data yourself.
If the storage medium is undamaged, the main reason may be:
The main causes of malfunctions that lead to loss of information
Or maybe files, important data were accidentally deleted or the partition in which they were located was formatted. Information recovery is carried out using certain software in manual or automatic mode.
When using the appropriate programs, all information that exists on the media is scanned. Based on the detected information, a “map” of fragments of recovered data is created. It contains information: which file belongs to which sector, names, sizes and other parameters of the elements of the system being scanned. The selected data is then transferred to another drive.
If nothing was written to the sectors from which information was deleted, then the data was not physically destroyed, but information about its location was distorted or lost. First of all, it is necessary to determine exactly where the sectors that store the necessary information are located, and also to reproduce it in the correct sequence.
If information was written to the disk from which the files were deleted, for example, formatting and installation of a new operating system, there is a high probability of physical destruction of the data. In these cases, the feasibility of successful information recovery depends on the ratio of lost and recorded data. For example, if you delete 2 gigabytes of databases and write 100 gigabytes of music and movies in their place, the probability of successful recovery approaches zero.
This article will review a variety of programs, both paid and free, and analyze their strengths and weaknesses so that the reader can quickly choose the most suitable software for his request.
Recuva is one of the most common programs for recovering lost data or formatted disks. The high demand for this program can be explained by its simple and intuitive interface. Recuva does not require experience or special knowledge in the field of data recovery, it is very convenient and easy to use. You can download it from here
The program scans the selected hard drive in detail (various hard drives and flash drives are supported). Information can be recovered even if the drive has suffered any physical damage or was formatted using a standard system command.
It is recommended to perform recovery using the program without changing the standard settings, unless, of course, you are an expert in the field of data recovery. This utility has a simple interface and will provide effective information recovery, even if the user does not have the necessary knowledge.
The program will prompt you to select the type of file to be restored. When searching for a specific file (music, picture, document), it is worth specifying the category to save time necessary for the recovery operation. But, if you do not know the file type or want to find data from different categories, specify “Other” and the program will search for all deleted information.
Choosing WHAT to look for
Next, you need to select the location where the file was located before deletion. You can select not only a separate folder, but also more extensive areas, for example: “My Documents” or “On a memory card”, and the program will check the selected area for the presence of the necessary data. If the exact location is unknown (the file was deleted using special programs or simply disappeared), you should leave “Exactly unknown” by default so that the utility scans the entire surface of the media.
We choose WHERE we will look
A window appears when you are ready to perform the restore operation. It is recommended to conduct an in-depth analysis: it takes longer, but its efficiency will be many times higher.
It is worth waiting a while while the program searches for files. If you did not choose in-depth analysis, the operation will take very little time.
Selecting information to restore
A window will open indicating the deleted data found. From this list, you should select the information that needs to be restored, after which the program will prompt you to select a folder for recovery.
It is important to correctly select the folder where our files will be restored, because this will affect the efficiency of their recovery. Restoration should be carried out to a drive other than the one from which the recovery is being carried out. This is especially true when returning a large number of files. You can connect an additional hard drive or flash drive to return data to them. The space should be slightly larger than the size of the files being restored.
The recovery procedure will not take much time and depends on the number and size of files.
R-Studio is a convenient and functional program for recovering information from various drives that was deleted by mistake. With its help, you can scan various media and recover lost data not only from hard drives, but also from flash drives. You can download the utility from the website http://www.r-studio.com/ru/Data_Recovery_Download
Initially, you should decide on the choice of version: demo or full. If you do not perform data recovery on a regular basis, it is better to choose the demo version. A 20-day period is more than enough to restore all information.
If you are not a pro, it is better to use the demo version
In addition to recovery, the utility can also perform a preliminary scan. This operation will speed up and increase the efficiency of the recovery procedure. It is worth noting that you can scan the device with third-party programs, and upload a file with a report on the work done to R-Studio. The utility always conducts a detailed scan by sector. This may take some time, depending on the size of the partition being scanned.
We scan the selected partition
After the scan is completed, it will be possible to view all the files that it was able to detect and then select those that can be restored. In order to restore a file, you need to right-click on it and select the “Recover” command.
R-Studio is convenient and multifunctional
If you don’t know exactly what was deleted from the device, and you are going to recover all lost files, in this case, right-click on the desired media and select “Recover all files.”
At the end, simply select the partition where to restore
At the end, you will need to select a folder where the seized information will be restored. Important! It is imperative to take into account that the folder should not be located on the hard drive from which the information will be returned, because during the recovery of some files, others may be completely overwritten by them.
After selecting a folder, you need to wait while the program diagnoses the drive and restores lost information.
Easy Recovery can safely be called a high-quality program for professionals, which can be mastered by an ordinary user. It has gained popularity due to its excellent efficiency and, at the same time, ease of use in comparison with similar utilities. The advantage of this program is that it can also perform preliminary diagnostics of the media. Download the program
Click on “Disc Diagnostic” and select the required command. If the utility was downloaded in order to recover data, then we conduct a deep scan “SmartTests”. In addition to scanning, the program will perform diagnostics and determine whether the hard drive has problems, for example, unreadable sectors or any others, in order to prevent troubles.
Diagnostic menu
After selecting the command, the type and number of media that are currently running on the device are determined. We choose which one we will work with and where to restore the information.
For the most accurate and complete diagnostics, select “Run extended SMART test”. First of all, you should be patient: the verification will take a lot of time.
Be patient and choose scanning
To restore files, go to the “Data Recovery” section and select the mode that is interesting to us. In this program, modes are selected depending on the specific situation.
For example, if you accidentally formatted your hard drive, select the “Format Recovery” category. Next, select the file system of the drive and the partition that was formatted.
If there is a need to recover deleted files, then select the “Deleted Recovery” function - the disk selection menu opens and the formats of the recovered files are determined.
Recovering lost files
If the data is lost as a result of a software failure or the reason for the loss is unknown, select the “Advanced Recovery” option. After scanning, the program will find information that was deleted within a certain period of time.
We choose what we need to restore. Typically, the diagnostic and recovery procedure does not take much time. This will depend on the amount of data that needs to be returned.
PhotoRescue Pro is a utility that will help you recover deleted photos or videos. Today's digital devices provide ample opportunities for recording, dubbing and optimizing media files. If you accidentally deleted the necessary files from a digital gadget, this utility will solve this problem.
With this program you can recover data from any type of flash drive, hard drive or mobile phone. It is possible to recover data even from damaged and formatted media.
Working with PhotoRescue Pro is very convenient and accessible. You can download it from here. The program supports many languages, including Russian. After selecting the language, a window appears in which we click the “Next” button and the registration window appears. If you just want to recover a few photos, there is no point in registering the program, but if you constantly work with your camera and this problem occurs to you quite often, it is worth purchasing the full version.
First, we select the drive from which we will return information. The utility works with several file systems at once, which is very beneficial. Click “Next”.
Analyzing the content
After selecting the drive we need, click “Next”, wait a couple of seconds - the utility will check the partition we have selected. A list of folders is displayed; we need to select the one that interests us. If the location of the file is unknown, click on the checkmark at the very top to highlight all the data found. "Next"
Select the desired folder
We select the formats of the files that interest us. To avoid mistakes, it is better not to uncheck individual formats so that the utility can find as much information as possible. Next, select the required files. Click “Next”.
Select the desired folder
Once you have completed selecting formats, the scanning operation will begin. The verification time will depend on the volume of data and will take from a few minutes to a couple of hours.
Scan duration depends on data size
The advantage of the program over analogues is that it simultaneously checks the drive for the presence of unreadable sectors. Thanks to this, you can not only restore lost information, but also carry out diagnostics and troubleshooting.
All that remains is to restore the data
After scanning is completed, a list of files opens. It is possible to search for files by categories (video, photo, audio) and formats, and not by sections and various folders.
The program shows how much data was found and what was deleted. Thanks to this, you will quickly find out which files were found and which were irretrievably lost.
GetDataBack is one of the most effective and most powerful. With its help, you can recover data in almost any situation. The developer divided the program into two subtypes: the first for the NTFS file system, and the second for FAT. Download it from here: https://www.runtime.org/data-recovery-software.htm
We recover all deleted files for effective results
This utility must be installed on a foreign hard drive. You cannot restore to the media from which files will be restored, since the necessary information will be overwritten.
After opening the program, a menu of four items appears. For maximum efficiency, it is recommended to select the fourth option – “I want to recover deleted files” (I want to recover deleted data).
Select the required section
In the list of local drives that opens, which the utility will find while scanning the hard drive, you need to find the partition where the deleted files were located. The program provides many possibilities in the field of data recovery, but if you just want to return information from the drive and do not know where it was, you should select the “Physical drives” category.
A file system window opens and you need to select the one that is supported by this version of the program (in our case, NTFS). Modern computers use different file systems simultaneously, so check the box next to “Show recommended”.
Select the file system we are interested in
After a detailed scan, the utility will open a folder explorer, simple and easy to understand. The contents of the selected folder will be displayed on the right; if the information was deleted, after recovery GetDataBack will show the files in strikethrough font for ease of classification. Each file is equipped with a special marking, which can be used to determine the type of information found.
Data recovery is easy and convenient
As a result, we select the data we need and start the recovery. Once finished, the recovered file will be available in the editor
Restoring files using this program in the FAT file system is carried out in the same way.
This article discussed, in my opinion, the most popular and effective programs for recovering deleted data from a hard drive and various media. For beginners, the popular Recuva with a simple interface is suitable; if you lose media files, you should choose PhotoRescue Pro, it can recover data from almost any modern gadget; for constant work with returning information, GetDataBack is ideal - it has powerful functionality, is efficient and at the same time has an ergonomic main menu.
If for some reason you were unable to recover your data, but the information is valuable, it makes sense to contact specialists. They have more powerful software and can help where these utilities are powerless.
Hello!
Almost every computer user has at least once grabbed his head and regretted that he deleted a necessary file or document from the disk (or, for example, accidentally formatted the media through his actions). But in many cases, it is possible to partially or even completely restore information - the main thing is to do everything correctly, so to speak, without fuss and haste!
To restore data, you need special utilities and programs. There are a lot of them now, and most of them are quite expensive (and, having paid for the software, it is unknown whether it will justify itself, whether it will be able to help restore data).
Therefore, in this article I will give the best free programs that will help scan your disk and find files that can be recovered (even after deleting them from the recycle bin or formatting the disk).
For reference: you've probably noticed that copying a file takes a long time - but deleting it takes a couple of seconds! The fact is that after you delete a file and empty the trash, it does not physically disappear anywhere from the disk. The file system simply excludes certain areas of the disk - it believes that there is no longer a deleted file on them, they are free, and any other information can be written to them.
Therefore, the less you work with the disk after deleting a file, the higher the likelihood of recovering information from it (since the likelihood that something will be written to the same areas of the disk is minimal!).
A couple of important rules:

This is probably one of the best free file recovery utilities! Despite its relatively small size, the utility is very effective in recovering data that was accidentally deleted from a hard drive or flash drive. The program is designed taking into account that it will be used by novice users, so it is very easy and simple to use - it has a step-by-step wizard that will help you set all the necessary settings.
The algorithm for working with the program is quite simple: after setting the parameters and selecting a disk, it scans it and gives you all the files that can be recovered. By the way, if we are talking about pictures or photos, then you can generally view them before restoring them (example in the screenshot above).
You will also be able to find out the name of the file, where it was previously saved, and its current state (the program marks files with different colors: green - excellent (high probability of normal recovery), yellow - average, red - bad (recovery unlikely)) . All you have to do is check the boxes that you need and start restoring.
Main advantages:

A very simple program for recovering files from various media (hard drives, flash drives, external drives, etc.). Supports a variety of file systems: NTFS, FAT and ExFAT. It is based on the algorithms of professional versions of the UFS Explorer program. By the way, the R.saver program is free only for non-commercial use in the following countries: Ukraine, Russia, Belarus (and a number of others).
Main advantages:
Pandora Recovery - https://www.pandorarecovery.com/(became Disk Drill)
Note: Free data recovery up to 500 MB!

Disk Drill is a free program for recovering deleted files (supports recovery of pictures, photos, documents, music, etc.). The program can work with almost any media: memory cards, flash drives, hard drives, external drives, iPod, etc.
The application can recover data not only after deleting it from the recycle bin, but also after formatting the disk, changing partitions, virus infection, or file system failure.
Main advantages:
![]()
A practical and very convenient program for restoring any documents and files after accidental deletion (including after formatting the hard drive). Transcend RecoveRx can work with different types of drives and different file systems (HDD, SSD, USB flash drives, memory cards, etc.).
Separately, we can note the interface: everything is done simply, consistently, there are no difficult-to-customize parameters. There is a step-by-step wizard that will help you recover data even for a completely inexperienced user.
Main advantages:
Note: the free version of the program has a limit (1024 MB) for saving recovered information.
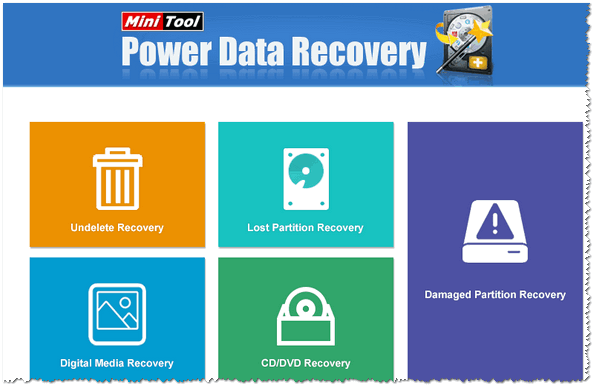
Power Data Recovery is a very powerful and effective program that can recover information from drives even in the most dire cases (when other utilities “refuse” to do this).
Such cases include: virus attacks, formatting the media, using the FDISK program, damage to the MBR boot sector, problems when creating partitions (and working with them), incorrect shutdown of the PC (for example, during power surges), etc.
Main advantages:
Of the shortcomings, I would highlight the most important one - there is no official support for the Russian language (I hope that only for now ☻).

PC INSPECTOR File Recovery is a free program designed to recover deleted information.
The program supports Windows file systems: FAT 12/16/32 and NTFS. The hard drive is visible even in cases where the boot sector and file allocation table have been damaged or deleted.
It is possible to search for a specific file format (the program supports all the most popular ones, the list is given below).
Main features:

Wise Data Recovery is a free program for recovering deleted photos, documents, videos, music, and email messages. The program sees not only local hard drives, but also all connected external drives, flash drives, memory cards, and other devices.
The program has a special function that allows you to evaluate the chances of being able to recover a particular file: in front of each file a special indicator will light up (green, yellow, red). The most likely successful recovery is for green files...
Main features:

CD Recovery Toolbox - this utility is designed to recover data from CD/DVD discs (a variety of types are supported: CD, DVD, HD-DVD, Blu-Ray, etc.). The program scans and finds files of various formats: music, movies, pictures, photos, documents. During the scanning process, the program applies several algorithms, which greatly increases its efficiency!
In general, it is quite an indispensable utility when working with CDs.
Main features:

This utility is part of a package of programs from Glary Soft (which it would be nice for every user to have on their PC - after all, everything they need is there: optimization and fine-tuning of Windows, working with disks, files, the registry and much more).
As for directly Glary Undelete- then it is a free and quite high-quality utility for recovering deleted information. The utility supports all the most popular file systems: FAT, NTFS, NTFS + EFS. Allows you to recover, among other things, compressed and encrypted files in the NTFS file system.
There are filters by name, date, size, and recovery capabilities (very convenient when you have found thousands of files on a disk, and you only need to select something specific).
The interface is very simple: drives, folders, etc. are displayed on the left, files on the right. At the top of the program: filters and search bar. All modern Windows 7/8/10 systems are supported.

Undelete 360 is a very good program for recovering deleted information from various storage devices (supported: hard drive, flash drive, memory card, digital camera, etc.).
The program works directly with the drive (bypassing Windows OS), allowing you to find and restore files in the event of a variety of problems: from simple careless deletion of a file, to formatting and a virus attack.
What's also captivating about this utility is that it can filter found files by their type and by the folder from which they were deleted. There is a file preview, which is very important for photos and pictures.
Undelete 360 supports and works with the following file types:
Additions on the topic are welcome ☻
A USB flash drive is not the most suitable device for permanently storing files, but anything can happen in life. And situations when valuable data located only on it were accidentally erased happen regularly. However, in about half of the cases, grief can be helped by recovering deleted files from a flash drive. Under what circumstances is this possible and how to do it, read on.
I won’t get my hopes up in vain: the chances of successful data recovery from USB flash drives are lower than from stationary drives - hard drives of PCs and laptops and permanent memory of mobile devices. The reason is that flash drives are usually used to transfer files from one device to another. And accidentally deleted data most often ends up being simply overwritten, sometimes even more than once. And overwriting, unfortunately, destroys the information irrevocably.
Full or partial file recovery on your own is possible in the following cases:
The chances of recovery are extremely low or zero if:
In case of physical and complex logical faults, data recovery from flash drives is sometimes possible, but often costs the owner very much - up to several tens of thousands of rubles (not even the result, but the attempt at recovery, can cost that much). Therefore, in such situations, many people prefer to say goodbye to files forever.
Even if your case falls into the simple category, in order to increase the chances of a successful recovery, adhere to the following rules:
You may already be familiar with some of the storage device data recovery programs. Our site talked about them in an article about. Today our collection will be replenished with seven more applications of the same purpose. Maybe one of them will be life-saving for you.
Wise Data Recovery is another worthy tool for recovering information from desktop and portable drives. Available only in Windows version. Like its predecessors, it works without installation on a hard drive. It has a high scanning speed and displays the possibility of restoring each found object.
If next to the file there is:
When you click on “green” files, if it is a picture or document, the program shows their thumbnails (if saved). It also has a function to search for certain types of data using keywords: pictures (imagies), audio (audios), videos (videos), documents (documents), archives (compressed files) and mail (emails).
Wise Data Recovery is a completely free application and, by the way, supports the Russian language.

How to use Wise Data Recovery:
The Disk Drill utility, well known to many Mac OS X users, appeared in the Windows version some time ago. More precisely, in two: free - free, and paid - pro. The free one allows you to recover up to 1 GB of information, the paid one - without restrictions.
Unlike the three previous applications, Disk Drill requires mandatory installation on the computer (for which it receives a minus, since this simple operation can lead to overwriting the data that the user was just about to restore). But it has a number of benefits that others do not have.
With constant use, Disk Drill keeps track of deleted files and also creates backup copies of them, which increases the chances of their recovery even after a while. In addition, it supports any type of storage device and almost all file systems (it knows more than 300 unique file signatures).
Disk Drill does not have a Russian localization, but it is quite easy to use.

How to recover deleted files using Disk Drill:

RS File Recovery is a paid Russian-language application. In addition to the main thing - restoring information from physical drives, it is able to save and subsequently work with their images. After creating the image, the physical device with the data can be disconnected, since the program has already “remembered” all its contents. In addition, the application has a built-in HEX editor for manual byte-by-byte correction of files, as well as an FTP client for uploading the recovered file to network resources.
After analyzing the storage device, RS File Recovery displays information about the data on it - when it was created, when it was changed, and whether it can be restored. This information appears in the bottom pane of the window.
Unfortunately, in the free demo version of the utility, the recovery function does not work, only viewing is available. The cost of a license starts from 999 rubles.
Like Disk Drill, RS File Recovery requires installation on your computer.

How to use RS File Recovery:

Ontrack EasyRecovery is one of the most functional and effective data recovery programs, the main competitor of industry leader R-Studio. It successfully extracts data even from heavily damaged media, supports all types of file systems and more than 250 file formats, creates virtual images of physical storage devices, can boot from DVDs and USB flash drives, and also has a lot of other useful features.
EasyRecovery is available in several paid editions with different sets of functions. The most inexpensive is home-based, which will cost the user $79 per year. Professional, enterprise and specialized (for servers) cost from $299 to $3000 for an annual license.
Despite the enormous possibilities, even a novice user can use this program, since each stage of the work is accompanied by a built-in assistant. It is also impossible to make a mistake because it is completely translated into Russian.

How to use Ontrack EasyRecovery:

To create an image of a storage device and work with it in the future, after starting the program, select the device in the list of media, open the “File” menu and click “Create image file”.

Active UNDELETE is another paid utility that successfully copes with the recovery of individual deleted objects and entire disk partitions. Supports all types of media, all file systems and over 200 different file formats. In addition to the main tasks, it allows you to solve related problems - correct errors in partition tables and boot records, create, format and delete disk volumes, etc. Like the majority of paid analogues, Active UNDELETE supports the creation of virtual images of drives.
The demo version of the program, available for free download, has a full range of functions, but does not allow you to recover files larger than 1 Mb.
The Active UNDELETE interface is exclusively in English, but the utility is easy to use, since each action is accompanied by a wizard.
Unfortunately, it does not have a portable version. Installation only.

How to work with Active UNDELETE:

If you want to create a virtual image of a flash drive, open the “Disk image management” section in the main window and run the “Create disk image” wizard.
Recovering files from a hard drive is an issue that worries many personal computer owners.
This includes the loss of valuable information and the time required for its successful recovery.
Specialized services charge a lot of money for this, but if the media is in good condition, it makes sense to try to recover the data yourself.
If the storage medium is undamaged, the main reason may be:
The main causes of malfunctions that lead to loss of information
Or maybe files, important data were accidentally deleted or the partition in which they were located was formatted. Information recovery is carried out using certain software in manual or automatic mode.
When using the appropriate programs, all information that exists on the media is scanned. Based on the detected information, a “map” of fragments of recovered data is created. It contains information: which file belongs to which sector, names, sizes and other parameters of the elements of the system being scanned. The selected data is then transferred to another drive.
If nothing was written to the sectors from which information was deleted, then the data was not physically destroyed, but information about its location was distorted or lost. First of all, it is necessary to determine exactly where the sectors that store the necessary information are located, and also to reproduce it in the correct sequence.
If information was written to the disk from which the files were deleted, for example, formatting and installation of a new operating system, there is a high probability of physical destruction of the data. In these cases, the feasibility of successful information recovery depends on the ratio of lost and recorded data. For example, if you delete 2 gigabytes of databases and write 100 gigabytes of music and movies in their place, the probability of successful recovery approaches zero.
This article will review a variety of programs, both paid and free, and analyze their strengths and weaknesses so that the reader can quickly choose the most suitable software for his request.
Recuva is one of the most common programs for recovering lost data or formatted disks. The high demand for this program can be explained by its simple and intuitive interface. Recuva does not require experience or special knowledge in the field of data recovery, it is very convenient and easy to use. You can download it from here
The program scans the selected hard drive in detail (various hard drives and flash drives are supported). Information can be recovered even if the drive has suffered any physical damage or was formatted using a standard system command.
It is recommended to perform recovery using the program without changing the standard settings, unless, of course, you are an expert in the field of data recovery. This utility has a simple interface and will provide effective information recovery, even if the user does not have the necessary knowledge.
The program will prompt you to select the type of file to be restored. When searching for a specific file (music, picture, document), it is worth specifying the category to save time necessary for the recovery operation. But, if you do not know the file type or want to find data from different categories, specify “Other” and the program will search for all deleted information.
Choosing WHAT to look for
Next, you need to select the location where the file was located before deletion. You can select not only a separate folder, but also more extensive areas, for example: “My Documents” or “On a memory card”, and the program will check the selected area for the presence of the necessary data. If the exact location is unknown (the file was deleted using special programs or simply disappeared), you should leave “Exactly unknown” by default so that the utility scans the entire surface of the media.
We choose WHERE we will look
A window appears when you are ready to perform the restore operation. It is recommended to conduct an in-depth analysis: it takes longer, but its efficiency will be many times higher.
It is worth waiting a while while the program searches for files. If you did not choose in-depth analysis, the operation will take very little time.
Selecting information to restore
A window will open indicating the deleted data found. From this list, you should select the information that needs to be restored, after which the program will prompt you to select a folder for recovery.
It is important to correctly select the folder where our files will be restored, because this will affect the efficiency of their recovery. Restoration should be carried out to a drive other than the one from which the recovery is being carried out. This is especially true when returning a large number of files. You can connect an additional hard drive or flash drive to return data to them. The space should be slightly larger than the size of the files being restored.
The recovery procedure will not take much time and depends on the number and size of files.
R-Studio is a convenient and functional program for recovering information from various drives that was deleted by mistake. With its help, you can scan various media and recover lost data not only from hard drives, but also from flash drives. You can download the utility from the website http://www.r-studio.com/ru/Data_Recovery_Download
Initially, you should decide on the choice of version: demo or full. If you do not perform data recovery on a regular basis, it is better to choose the demo version. A 20-day period is more than enough to restore all information.
If you are not a pro, it is better to use the demo version
In addition to recovery, the utility can also perform a preliminary scan. This operation will speed up and increase the efficiency of the recovery procedure. It is worth noting that you can scan the device with third-party programs, and upload a file with a report on the work done to R-Studio. The utility always conducts a detailed scan by sector. This may take some time, depending on the size of the partition being scanned.
We scan the selected partition
After the scan is completed, it will be possible to view all the files that it was able to detect and then select those that can be restored. In order to restore a file, you need to right-click on it and select the “Recover” command.
R-Studio is convenient and multifunctional
If you don’t know exactly what was deleted from the device, and you are going to recover all lost files, in this case, right-click on the desired media and select “Recover all files.”
At the end, simply select the partition where to restore
At the end, you will need to select a folder where the seized information will be restored. Important! It is imperative to take into account that the folder should not be located on the hard drive from which the information will be returned, because during the recovery of some files, others may be completely overwritten by them.
After selecting a folder, you need to wait while the program diagnoses the drive and restores lost information.
Easy Recovery can safely be called a high-quality program for professionals, which can be mastered by an ordinary user. It has gained popularity due to its excellent efficiency and, at the same time, ease of use in comparison with similar utilities. The advantage of this program is that it can also perform preliminary diagnostics of the media. Download the program
Click on “Disc Diagnostic” and select the required command. If the utility was downloaded in order to recover data, then we conduct a deep scan “SmartTests”. In addition to scanning, the program will perform diagnostics and determine whether the hard drive has problems, for example, unreadable sectors or any others, in order to prevent troubles.
Diagnostic menu
After selecting the command, the type and number of media that are currently running on the device are determined. We choose which one we will work with and where to restore the information.
For the most accurate and complete diagnostics, select “Run extended SMART test”. First of all, you should be patient: the verification will take a lot of time.
Be patient and choose scanning
To restore files, go to the “Data Recovery” section and select the mode that is interesting to us. In this program, modes are selected depending on the specific situation.
For example, if you accidentally formatted your hard drive, select the “Format Recovery” category. Next, select the file system of the drive and the partition that was formatted.
If there is a need to recover deleted files, then select the “Deleted Recovery” function - the disk selection menu opens and the formats of the recovered files are determined.
Recovering lost files
If the data is lost as a result of a software failure or the reason for the loss is unknown, select the “Advanced Recovery” option. After scanning, the program will find information that was deleted within a certain period of time.
We choose what we need to restore. Typically, the diagnostic and recovery procedure does not take much time. This will depend on the amount of data that needs to be returned.
PhotoRescue Pro is a utility that will help you recover deleted photos or videos. Today's digital devices provide ample opportunities for recording, dubbing and optimizing media files. If you accidentally deleted the necessary files from a digital gadget, this utility will solve this problem.
With this program you can recover data from any type of flash drive, hard drive or mobile phone. It is possible to recover data even from damaged and formatted media.
Working with PhotoRescue Pro is very convenient and accessible. You can download it from here. The program supports many languages, including Russian. After selecting the language, a window appears in which we click the “Next” button and the registration window appears. If you just want to recover a few photos, there is no point in registering the program, but if you constantly work with your camera and this problem occurs to you quite often, it is worth purchasing the full version.
First, we select the drive from which we will return information. The utility works with several file systems at once, which is very beneficial. Click “Next”.
Analyzing the content
After selecting the drive we need, click “Next”, wait a couple of seconds - the utility will check the partition we have selected. A list of folders is displayed; we need to select the one that interests us. If the location of the file is unknown, click on the checkmark at the very top to highlight all the data found. "Next"
Select the desired folder
We select the formats of the files that interest us. To avoid mistakes, it is better not to uncheck individual formats so that the utility can find as much information as possible. Next, select the required files. Click “Next”.
Select the desired folder
Once you have completed selecting formats, the scanning operation will begin. The verification time will depend on the volume of data and will take from a few minutes to a couple of hours.
Scan duration depends on data size
The advantage of the program over analogues is that it simultaneously checks the drive for the presence of unreadable sectors. Thanks to this, you can not only restore lost information, but also carry out diagnostics and troubleshooting.
All that remains is to restore the data
After scanning is completed, a list of files opens. It is possible to search for files by categories (video, photo, audio) and formats, and not by sections and various folders.
The program shows how much data was found and what was deleted. Thanks to this, you will quickly find out which files were found and which were irretrievably lost.
GetDataBack is one of the most effective and most powerful. With its help, you can recover data in almost any situation. The developer divided the program into two subtypes: the first for the NTFS file system, and the second for FAT. Download it from here: https://www.runtime.org/data-recovery-software.htm
We recover all deleted files for effective results
This utility must be installed on a foreign hard drive. You cannot restore to the media from which files will be restored, since the necessary information will be overwritten.
After opening the program, a menu of four items appears. For maximum efficiency, it is recommended to select the fourth option – “I want to recover deleted files” (I want to recover deleted data).
Select the required section
In the list of local drives that opens, which the utility will find while scanning the hard drive, you need to find the partition where the deleted files were located. The program provides many possibilities in the field of data recovery, but if you just want to return information from the drive and do not know where it was, you should select the “Physical drives” category.
A file system window opens and you need to select the one that is supported by this version of the program (in our case, NTFS). Modern computers use different file systems simultaneously, so check the box next to “Show recommended”.
Select the file system we are interested in
After a detailed scan, the utility will open a folder explorer, simple and easy to understand. The contents of the selected folder will be displayed on the right; if the information was deleted, after recovery GetDataBack will show the files in strikethrough font for ease of classification. Each file is equipped with a special marking, which can be used to determine the type of information found.
Data recovery is easy and convenient
As a result, we select the data we need and start the recovery. Once finished, the recovered file will be available in the editor
Restoring files using this program in the FAT file system is carried out in the same way.
This article discussed, in my opinion, the most popular and effective programs for recovering deleted data from a hard drive and various media. For beginners, the popular Recuva with a simple interface is suitable; if you lose media files, you should choose PhotoRescue Pro, it can recover data from almost any modern gadget; for constant work with returning information, GetDataBack is ideal - it has powerful functionality, is efficient and at the same time has an ergonomic main menu.
If for some reason you were unable to recover your data, but the information is valuable, it makes sense to contact specialists. They have more powerful software and can help where these utilities are powerless.
Storing information in digital form has many advantages, among which the most significant is the amount of data that can be recorded in the minimum unit of memory of a digital device. But this storage method also has its drawbacks. If the storage device fails, the operating system crashes, or user errors occur, data may be lost. Fortunately, in most cases, unintentional file deletion is not permanent and with the right and timely approach, they can be recovered.
Recovering deleted files is possible thanks to the very algorithm for recording information on the hard drive. New files are not written to empty sectors or cells, but over previously deleted ones, physically stored on the disk until they are completely overwritten. That is, when deleting, files are not destroyed immediately. Instead, the system erases the first character of the file name and marks the space it occupies as free, while the file itself remains on the disk. The exception is SSD drives with the TRIM function enabled; the cells of such media are completely erased, so restoring accidentally deleted files becomes an almost impossible task.
So, is it possible to recover files deleted from your computer? Yes, quite, unless they were overwritten by other data. For these purposes, it is best to use special programs, since Windows itself does not have any intelligible tools. You can restore files using standard tools only if they have been moved to the Recycle Bin, and also if the system has the shadow copy function and/or file history enabled. First, let's look at an example of recovering files deleted from a hard drive without using third-party programs.
In Windows 7 and 10, if you open the properties of any folder or file, you can see the “Previous Versions” tab, and in it - a list of backup copies of objects. Even if the files were deleted past the Recycle Bin, just select the desired backup version and click the “Restore” or “Open” button.
But it's not that simple. The fact is that your “Previous Versions” tab will most likely be empty, at least in the properties of directories on the user disk. In order for copies to be created, protection must be enabled in the system properties for the corresponding partition, that is.

Note: You can return deleted files using the “Previous Versions” function only if they were located in folders and not in the root of the disk.
It is highly desirable that the system also enable the “File History” function, which provides periodic backup of the contents of user libraries and the desktop.

This primarily applies to Windows 8 and 8.1 systems, in which there is no “Previous Versions” tab in object properties. It is difficult to say for sure what prompted Microsoft developers to remove it from the eighth version and then return it in the tenth, however, the shadow copy technology itself was untouched.
How to recover files deleted from a computer by gaining direct access to shadow copies will be discussed below, but for now let’s say a few words about “File History”. This option appeared in Windows 8 as an alternative to the “Previous Versions” function, which were tied to the creation of system restore points. The “File History” function is independent, but in order to use it, an additional physical disk or flash drive must be connected to the computer, or, alternatively, a network drive.
Recovering deleted data with its help is very simple. To do this, click on the “Recover personal files” link, select a folder or a file located in it in the window that opens, and click the button with a rounded arrow.

Now regarding the recovery of files from shadow copies in Windows 8 and 8.1. As already mentioned, the “Previous Versions” tab is missing in these versions of the system. So what if you need to restore a specific file, do you really need to roll back to the previous restore point? Not at all necessary.
Open a command prompt as administrator and run the command vssadmin list shadows.

As a result, you will receive a list of all restore points. Pay attention to the “Source volume” parameter; it will indicate the drive letter from which you are going to recover data. Then, having determined the backup copy number (it is indicated at the end of the Shadow Copy Volume parameter value), run the following command:
mklink /d %SystemDrive%/shadow //?/GLOBALROOT/Device/HarddiskVolumeShadowCopy7/

In this example, the recovery point is number 7, your value will be different. As a result of executing the command, a symbolic link will appear in the root of drive C shadow.

By following it, you will find yourself exactly in the shadow copy!

This method works equally well in Windows 7, 8, 8.1 and 10, but again you need to remember that it makes sense to resort to it only if the system has the function of creating system restore points enabled.
Above, we examined in detail how to restore files deleted from the Recycle Bin when emptying it or lost for other reasons, using the system itself. As shown above, all these methods have significant limitations. To be able to recover data directly from a disk, and not from backup copies, you should use special programs, including both paid and free ones.
R-Studio is a powerful professional program for recovering deleted files from a wide variety of digital devices, from hard drives to CD/DVDs and memory cards. The application supports working with all popular file systems, RAID arrays, and can create images of physical disks and individual volumes. Despite the fact that R-Studio is aimed at experienced users, the data recovery procedure in it is not complicated.
After launching the program, select the target disk or partition in the left column and click the “Show disk contents” icon on the toolbar.

In this case, a list of deleted directories will be displayed on the left, and their contents, marked with red crosses, will be displayed on the right.

Check the boxes for the objects you would like to restore and select the “Restore marked” option in the main menu. Next, in the window that opens, you will need to specify the folder to save the files, set additional recovery options if necessary, and click “OK.”

If files have been lost due to file system damage or formatting, it is advisable to scan the disk by selecting the appropriate option in the main menu.

Preliminary scanning of the media allows you to perform a more holistic and in-depth analysis, which means increasing the chance of recovering lost data.

Upon completion of the procedure, a new item “Found by signatures” will appear in the list of disks.

Select it with the mouse, click in the right column on the link “Files found by information about the typical features of their data structure”, mark the necessary elements in the next window and restore them.

Another professional commercial product that allows you to quickly and effectively recover deleted files. Ontrack EasyRecovery has a convenient interface in the form of a step-by-step wizard, which greatly facilitates working with the program. The application supports data recovery from hard drives, ZIP and CD/DVD drives, flash drives, memory cards, RAID arrays, as well as various devices with flash memory.
The recovery procedure in Ontrack EasyRecovery consists of several stages. At the first stage you will be asked to select the media type, at the second you need to specify a specific disk or partition, at the third you will need to select an operation (in this example it is recovery).


To do this, select the directory with the deleted files in the tree list (it will be marked in green), right-click on it and select the “Save as” option from the menu.

You can also restore individual files by doing the same in the right column of the program window. If you switch to the “Previews” tab, you can view thumbnails of the files being restored, although such viewing is only available for images.
Among the free programs for recovering deleted files, we can recommend Recuva. This simple yet effective tool allows you to recover any type of data from various digital media, supports viewing previews of images and hexadecimal code of files of different formats.
Recuva is very easy to use. After starting the program, you need to select a volume in the drop-down list and click the “Analyze” button. The program will scan the media and display a list of deleted files.

Check the boxes for the items you need, click the “Recover” button and specify the directory to save them.

You can also use the context menu by selecting the “Restore selected” option.

The program has a simple search by file name and format, and you can view basic information - status, date of creation and modification, size and full path.

So, we looked in detail at what to do if you deleted the file you needed. Using third-party programs in this case has its advantages, as it allows you to recover files even if the partition is deleted and the file system is damaged, but there are some things to keep in mind. If you accidentally delete or lose files, never write any data to the partition in which they were located, as there is a risk of overwriting the sectors containing them.
For this reason, the recovery program should be installed on a “free” partition, different from the one from which you are going to restore. Ideally, you need to remove the hard drive, connect it to another computer and start scanning from it. You also cannot save recovered files to the same partition; in this case, you risk losing them completely. That is, if you are restoring files from drive D, you should save them to drive C or a flash drive.


