Connected VKontakte comments on your blog or website are a good tool and a source for receiving additional traffic. A visitor will comment on your post through a widget or comment plugin from VKontakte and leave the bird untouched, his comment will appear on his wall.
This fact will not go unnoticed by his friends, who, perhaps, after visiting your site, will have an opposite opinion or a coinciding one and a dialogue will begin...
Positive factors from adding comments on VKontakte
1. Significant replenishment of visitors moving from the VKontakte social network to your website. It is noticeably felt within the first months after installation of the form. And what's the reason? In this form, the default checkbox is set to “Display on your page”:

Many people don’t pay attention to it at all, it remains and the number of links to your site grows, and new visitors from VKontakte come through them, and they can even post on their wall.
2. The number of comments is growing. The process of commenting through the form developed by WordPress is complicated, such comments must go through a manual moderation procedure, it is easier to do this through the VKontakte comment entry form (there is no need to type either name or email), and the comment appears, as they say, “in one click, they become what they were before. The number of people who want you to add them as friends. The benefits of this fact do not need to be explained.
4. The ability to work through comments on the “administration” tab, where you can simply eliminate something unwanted

Negative factors from adding comments on VKontakte on WordPress
1. Additional burden due to the need to personally review and respond to comments on VKontakte, and for this you need to regularly visit specific articles on your site or do this through the administration. If you love to ride, you also love to carry sleds. Previously, replies were done from the WordPress admin panel.
2. VKontakte comments are not synchronized with the database on the site. All comments are their property.
You can add VKontakte comments to WordPress using a widget or plugin
via widget, step by step:

3rd step To set comments, click and go to the widget code from VKontakte.

4th step On the code generation page for your site, fill out a small form. Specify the site name, domain, how many comments to display, extended version of comments and block width. Next, click “Save” and enter the captcha. After saving, a code will be generated to insert comments from VKontakte onto the site.

5th step The code consists of two parts. Copy and paste one part into the file header.php before the closing tag .

6th step We copy and paste the second part of the code into the single.php file before

We save the file, go to the blog or website page and see that comments from VKontakte are connected.
1st step We go to the admin panel on our website in WordPress, select “Plugins” in the menu à “Add new” à type vkontakte api “Search for plugins” Find the plugin and click “Install”

2nd step After successful installation, select “Activate plugin”

3rd step Let's go to the plugin settings

4th step Due to the lack of ID and secure key, we follow the link

5th step In the window that opens, create an application by clicking “Proceed to download”
application" by first entering its name and description

6th step In the next window that opens, enter the received code that came to your
cell phone in literally less than 30 seconds, and click “Send”

7th step In the window that opens, copy the ID and protected key and paste them into
the corresponding fields in the window opened in step 6. Return to this window and fill in
website address and base domain, click on “Save changes”

8th step In the plugin settings, check the box for “Show Vkontakte comments first”, set up buttons and other useful things and click “Save settings”

We update the cache by logging out and logging back into our site, using a useful function. So, we looked at two methods of How to add VKontakte comments in WordPress. I don’t know where to go in more detail, but maybe the video will also be useful. By the way, look at other blogs, don’t limit yourself to just VK!
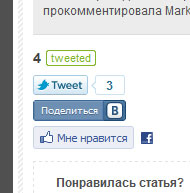
Say what you want, but recently the activity of using various buttons for adding blog posts to social networks has increased. The idea and accessibility of this method, it seems to me, is much better than various social bookmarking services, most of which in RuNet were simply “dead.” A couple of top bookmarking social networks could still somehow exist and be posted on blog pages, but the many buttons and options that different services provided were useless. Now, perhaps, this can be compared with Google Buzz - many people have started using the new service, at the moment it doesn’t seem to work (and did it work?), but the corresponding icon is still placed on many projects. But if we talk about Twitter, Facebook and VKontakte, it’s a completely different story.
In general, there are several solutions for creating a VKontakte button (as well as some others), but I recently found a couple more interesting WordPress plugins that I will share with you. But first, a little theory and “repetition of the material covered.”
1. The first option for the VKontakte button is to use pictures and code from the service. To add a simple standard code:
When changing it “for yourself”, pay attention to the link to the image vkontakte.gif, which should be located in the template folder, the images directory. The standard button that you see at the very end of the article on this blog can be changed to any other one. Also, do not forget to specify its width and height using width and height. The advantage of this option is that it’s elementary, you don’t even need to understand much about the code, you can add “as is.”
![]() 2.
Option two - adding a button using . The module is quite easy to install and allows you to display the number of users who have used it. In general, a little interactivity, as well as some interesting options when setting up.
2.
Option two - adding a button using . The module is quite easy to install and allows you to display the number of users who have used it. In general, a little interactivity, as well as some interesting options when setting up.
At this stage I am using this option and I like it.
3. Plugins for a regular button on VKontakte and other social networks. Some time ago I published a selection where, unfortunately, there was no VKontakte, but popular foreign services were presented and their very original presentation on the blog.
Theoretically, you could get into the plugin code and, using the knowledge from the first option, replace some unnecessary bourgeois service with the VKontakte social network. But I decided to look for ready-made options. As luck would have it, there were a lot of plugins, but most of them were completely useless and dull. In the end, I chose only two worthy candidates (despite the fact that I needed one more additional condition).

The plugin is designed purely for RuNet, as it contains our most popular social networks - VKontakte, Odnoklassniki, Moy Mir, livejournal, Facebook and Twitter. If I'm correct, then it is somewhat similar to the VK Share Button, or, more precisely, it includes its functionality. You can choose different options for displaying buttons, as well as set some settings for each of them. It is possible to sort buttons and select some of them.
The biggest drawback of the plugin is, in fact, its limitation only to popular Runet social networks, which is not always justified. And I just needed to add LinkedIn to the site in addition to VKontakte. I admit, I looked through a lot of plugins until I found the super cool and useful Share and Follow.
is the coolest plugin with social bookmarking buttons that I have ever seen. There are a lot of possibilities and just as many settings. Installation and getting started is quite quick - download the plugin, activate it in Amdinka and indicate in the Share and Follow section which buttons you need. They will immediately appear on the blog pages.

After this, you can begin detailed settings - you can choose the size of the buttons, many different social services, as well as general features (RSS, email, print version). This same plugin adds a follow element to the side of the scroll bar and also has many other options. There are paid options, but there are enough free ones without them. I suggest watching a short video on using Share and Follow:
I may look at the Share and Follow module in more detail in the future, but you don't have to wait for me to explore it yourself. The most important thing is that it is ideal for both Runet and English-language sites - the list of social services is more than sufficient. Installation is quick and easy, in short, Share and Follow should be in the archives of any wordpress website/blog developer.
P.S. By the way, about social networks, you may find useful statuses about life for VKontakte, which you can set up for yourself very simply.
There are several basic psychological aspects in life, such as personal self-development, that allow you to achieve great success and results.
You can slightly improve your vision without glasses by wearing contact lenses to work or school, order them online.
Good afternoon dear friends. Every day a dozen visitors come to your blog, and some of them are more accustomed and more convenient to leave a comment through a social network. But alas, your blog does not have a built-in widget VKontakte comments WordPress. And so you lose precious comments that cheer you up even in difficult times, right?) And today I will tell you how to insert it into your blog , in fact, a lot has been written about this on the Internet, but somehow not in very detail and I decided to correct the situation, by the way, since we touched on the topic of SMO, I advise you to read my article “ “
Let's do a little analysis and think about why you need to put VKontakte comments on your WordPress blog:
Now let’s move on to practical actions and install VKontakte comments on your WordPress blog. By the way, I want to inform you that my friend’s blog is hosting a rather interesting competition “Why am I blogging? “Hurry up to participate and before I start, don’t forget to subscribe to my blog updates.


Our next step will be to install VKontakte comments on your WordPress blog.
So we follow this link or go to VKontakte and in the bottom menu click on the link to developers, then you will see three large columns on the top, one of them will be called Documentation. Click it and in the For sites column click the Comments link.
Once on the page you will see this form: 
Now, in order. In the site column, select the name of your Api that we created in the last step. You can choose the number of comments to display according to your taste and color. By checking the Media box, you activate the function of leaving not only comments in the comment form (sorry about the butter ;)), but also photos, videos, and graffiti.
You can leave the width as default, but later you will still select the desired size.

You need to paste the first two parts of the code in the blog admin panel into the header.php file between the tags

Greetings, dear blog visitor. In this article we will talk about the comment block from the social network Vkontakte. Let's look at the step-by-step installation of comments on a WordPress website/blog. Before we get started, let's talk a little about the pros and cons of VK comments.
+
an additional influx of VK visitors to your site is a huge plus of the VKontakte comment block on WordPress.
Let's take a closer look at this plus of comments and how it works: the main and most important positive point is that a visitor to your site, leaving a comment under an article on your WordPress site,
automatically duplicates this comment on your wall, thereby attracting the attention of your friends and page visitors to your site.
It looks like this:

Visitors leave comments more often. This is due to the fact that most visitors to your site are registered on the VKontakte social network, so if he liked the article or has questions, he can easily leave a comment without filling out additional data (as is usually the case for leaving standard comments).
— The only downside, I think, is that the VKontakte comment block on a blog/Wordpress site is not indexed by search engines. This means that all comments that users left through the social network are not displayed when the search engine robot visits, thus the comments do not appear in the search results.
1.In order to install comments from VK, you need to go to the developers’ page, this can be done by clicking on the link http://vk.com/dev.
2. Then click on the button “ Create an application«.

3. After going to the page, fill in the Name (can be anything) and select the application type - website. Next, you need to fill in the “Site Address” and “Base Domain” fields. After you have completed all the steps, feel free to click “ Connect the application«.

4. At this stage of installing comments on your WordPress site, you need to confirm your actions on the VK network. To do this, click on the “Confirm via SMS” link.

Then “Get code”. Within a few minutes, a confirmation code will be sent to the phone number attached to your VK page, which must be entered in the field.

If, for some reason, the confirmation code has not been received, click “Resend code” and then select “Yes, let the robot call.”

5. After entering the confirmation code, click “Send code”. At this stage, we have added our site to the list of applications on the VKontakte network. Now let’s move on to creating and setting up a VKontakte comment block.
6. Go to the quick start page by clicking on the link http://vk.com/dev/main. On this page we go down to the “Widgets” block. Find the “Comments” link and click on it.

7. At this stage, you need to configure the future block of VK comments on the site by selecting “Site/application”, which we created in, then select the number of comments that will be visible after the article. If you do not want links, videos, etc. in the comments, uncheck the “Enable extended comments” checkbox.
At this stage, the settings for the comment block are complete; in the next steps we will install this comment block on our WordPress site.
8. Before implementing the VK comment code, you need to customize our comment block by specifying its width. In order for the VKontakte comment widget to fit into our WordPress blog, you need to know the width of the site column in which the article text is located. To do this, you need to go to the site, select part of the text of any of the articles, right-click, then select “View element code” or “Inspect element”, the choice depends on the type of browser.


9. After we have found out the width of our future VKontakte comment block, we return to the settings and set the width we need.
10. At this stage, we will insert part of the widget code into the header of our site, for this we need our website, Appearance - Editor. On the right side, find the header.php file and click on it. Then we return to the widget settings and copy the first part of the code.

Then we return to the site admin panel, to the header.php file, in the file code we find the tag and paste the previously copied part of the VK widget code in front of the found tag. Then save the changes by clicking “Update file”. Correct insertion of the comment widget code into the header of the WordPress site in the screenshot below.

11. The second part of the comment block code is inserted exactly where you want to place the widget. I recommend putting it before the main wordpress comments. To do this, in the site admin panel, Appearance - Editor, find the file “comments.php” and click on it. Afterwards, copy the second part of the widget and paste the code at the very beginning of the comment file. Then we save.

Now you can go to your website, go to the article and rejoice, the VKontakte comment block has been successfully installed on your WordPress site.
Eh, it’s been a while since I wrote something about WordPress and VKontakte. And then I decided to write instructions on how to install VKontakte comments widget for the site on WordPress. Kill two birds with one stone, so to speak. In general, I have had 2 comment forms on my blog for a long time: a regular WordPress one and a VKontakte comment form. I put them in different “tabs” (when you click on different buttons, different information is displayed). Actually, I would like to start by saying a few words about the pros and cons of using VKontakte comments on the site.
1) If a user authorized on the social network VKontakte reads your material and suddenly wants to leave a comment, then in this case you will not have to enter your e-mail, name, and most often a captcha as in the standard form, but only the comment itself. It also eliminates the need for registration, if one was previously provided for commenting through a standard form.
2) Based on the first, the second advantage can be considered to be the fact that the commentator will be visible “in person” - his photo and first and last name. It’s much more pleasant for a “living person” to answer, but not everyone provides real data and photos.
3) For those who have a lot of spam on their site, this will be a big plus. Since spam in this comment form is minimal in quantity, while the VKontakte comment form is used without a captcha.
4) You can ban (add to the blacklist) users who leave spam and they will never be able to leave comments with you again. By the way, there is no pre-moderation (only deleting comments already left), but personally I only used it if the comment had a link. Moderating comments at least once a week is not difficult and will not take much time. By the way, you can also add moderators.
5) A distinctive plus - you can get additional traffic from social media. networks. In some cases it is quite considerable.
1) For those who allow leaving dofollow links in the standard comment form will be a minus. If you receive a lot of comments on your blog, and you suddenly disable the standard form and put VKontakte comment form the number of comments will likely decrease as the majority of comments are likely to come from dofollow links – which is one of the ways to get traffic to your site. Who has the links? nofollow or the line was removed altogether URL in form - there is no minus in this case.
2) Well, and a couple more small disadvantages. The first is that you can’t customize the design, so for some it won’t fit into the design very well. Secondly, although the social network Vkontakte has gathered all of Russia, there are people who do not use it.
As you can see, the number of pros significantly outweighs the number of cons. If you have a desire and at the same time have doubts about the advantage, try leaving 2 comment forms (though it’s a little ugly and cumbersome, but it can be solved). Now let’s move on directly to the process itself and look at how to insert VKontakte comments onto a Wordpress website.
I do not recommend using any WordPress plugin to use VKontakte comments. It only takes a few minutes to install manually. And an extra plugin on the site is a lot of negative factors.
2) On this page you can read the information and create a form for your site. In the form, we indicate all the necessary information in the empty fields: Site name, Site address, Main domain of the site (usually the same as the site address). Next, indicate how many comments will be displayed on the page (the rest are collapsed and available by clicking “to previous posts”). You can prohibit the use of photos, audio, videos, links, graffiti in comments - to do this, uncheck the box next to “Media”. If you want to block not everything, but something specific, for example links, then click “more details” and uncheck the necessary boxes. The width can be adjusted to suit your design, but it is better not to touch it if you do not understand this.

4) Copy the first part of the code (highlighted with a large curly brace in the screenshot) and paste it into the theme file header.php before the closing tag(to avoid messing up, insert immediately before this tag). To do this, go to the control panel “Appearance -> Editor -> Header (header.php)”, edit and save (the “Update file” button).
5) Copy the second part of the code and paste it into the “Single Entry” file (single.php) after the output of the material –and just before. Save the changes (the “Update file” button). Ready! If you wish, you can disable the standard comment form in your WordPress settings.
To moderate messages, log in using the account you used to create the comment form. Click the inscription at the top of the “administration” form. For convenience, click the “Review” tab and you will see all the comments left on your site. The “Comments” tab displays only comments on this page with the material. The users you add there during moderation are placed in the “Black List” accordingly.

To delete message Hover over the comment and click on the gray cross that appears in the upper right corner. Then you can: “Restore the comment”, “Delete all her messages for the last week and add her to the blacklist” and simply leave this comment deleted.
To add administrator Click “Assign administrators” and on the page that opens, enter a direct link to the page of the required person and click the “Add administrator” button.
Phew, what a great article! If you have any problems or questions, write in the comments.


