To connect a computer to the Internet, a wire called twisted pair is used. To connect it, you must first prepare the ends of the cable. More precisely, put special connectors on them, which can already be connected to a computer or router.
Sometimes you need to wire the Internet around your home or office. In this case, special sockets are placed at the end of the twisted pair. Within the framework of this article, we will consider how to install Internet outlets, as well as the basic rules for crimping an RJ-45 connector and connecting a twisted pair.
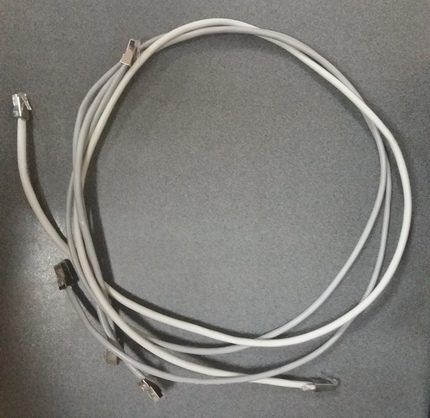
Its second name is patch cord. This is a small transparent plastic connector, which is like a "plug" for sockets of network cards, routers, switches and other communication devices.
Depending on what the cable will be connected to, there are two types of switching:
To use a specific type of switching, the wire is crimped on both sides. The cable itself consists of several color cores that are inserted into the patch cord in a certain order. This order determines the functional load of the cable.
IMPORTANT: Usually the provider company leads the wire to the apartment. In this case, it is not always possible to see how it is crimped in the junction box. If you decide to install the RJ-45 connector yourself, you should first ask those. company support, how the cable was originally crimped in the junction box.
So, a twisted pair cable consists of 8 strands of wires. Each core is insulated in a certain color. Let's list all the colors:
Now let's move on to the RJ-45 connector itself. The patch cord also contains 8 contacts (pins), to which the twisted pair wires are connected. Depending on the sequence in which the wires are connected, the functionality of the wire changes. The sequence of installation of the cores in the connector is also called "pinout".
If you look at the connector from below so that the latch looks at the floor, and the copper contacts look at the person, it turns out that the contacts will be arranged in order from 1st to 8th from right to left. It is important not to confuse the order!
Based on this, the connection scheme by color is as follows:
Both ends of the connector are crimped according to this scheme.
Reverse (for cross connection). One end of the twisted pair is crimped as in a straight line. The second is connected in the following sequence:
To connect the wire, it is desirable to have a special tool on hand, as well as to have minimal wiring skills.
INFO: If there are many twisted-pair wires in an apartment or office at once, and all of them are connected in different ways, it is worth marking the wires with reverse switching. This will make it easier to work with cables in the future.

To crimp a twisted pair you will need:
Consider a step-by-step wire crimping algorithm:
This is the correct way to crimp the cable. However, there are also artisanal methods for installing the connector.
Not every home has crimping scissors. Rather, it is a professional tool that does not find its adaptation in everyday life. Most often, their crimper is at hand, so you have to work with what is in the house.

So, for home installation of the RJ-45 connector, we need:
The sequence of actions is exactly the same as when working with crimping scissors. Only the removal of all insulation from the wires will be done with a knife, and the core clamp - with a screwdriver.
It is necessary to carefully tighten each core in the connector. To do this, it is best to fix the patch cord in a vise, and hold the twisted pair cable with your free hand. The core is clamped with a copper tongue of the pin. It is fixed with a small screwdriver.
It is worth checking all patch cords for reliability. There are three main ways:
These methods allow you to fully evaluate the quality of switching.
Having dealt with crimping a twisted pair, let's move on to the main topic of the article - connecting an outlet to a twisted pair.
A twisted-pair socket allows you to hide all unnecessary wires in the wall, and leave an Internet connection on its surface in any room. The entire installation process can be divided into several stages:
This order is suitable for installing sockets of different types. Let's take a look at the different types of connections one by one.
The external socket resembles in its form the old telephone nodes. These are small plastic boxes with a cable entry on one side and a wire socket on the other. Consider the installation algorithm for this node:
USEFUL: If you don't hear a click, you can push the core all the way in with a small screwdriver. Carefully lower the core to the bottom of the base of the terminal block so that it hits the copper contact.

Installing an internal outlet into a wall is no different from installing a conventional electrical outlet. In this case, the switching inside the device is identical to the connection of the cores in the wall node. The difference can only be in the technical design of the terminal blocks and internal clamping devices of the individual manufacturers.
ATTENTION: To carefully disassemble the socket and not break anything, carefully read the user manual. It indicates the complete assembly / disassembly algorithm of the node.

Installing an outlet in a wall is a simple undertaking. The main thing is not to confuse the color scheme and act carefully and without haste. Do not run too short wires into the knot. Check the quality of the network connection before mounting the socket in the wall.
Do you have a need to install a special outlet for connecting the Internet, but you don’t want to call the wizard at all? Agree that self-installation will save money, and you will be sure of the quality of the work performed.
But you do not know how to connect an Internet outlet and what is required for this? We will tell you where to start - this article will explain in detail to the home master and civil engineer the connection features, as well as give comprehensive answers to all related questions.
Visual photos and useful videos will help you understand the installation process and tell you what you need to focus on when connecting RJ-45 sockets.
Most of us live in multi-room apartments and private houses. For each separate room of such dwellings, it is necessary to solve one small but rather “insidious” problem: to create a “point” for connecting devices of different types to the Internet in any way possible.
It would seem that the answer is obvious - buy and install a Wi-Fi router and there are no problems. But some people, to put it mildly, are not enthusiastic about the negative impact of electromagnetic waves from medium- and low-power generators on their own health, the health of their loved ones, and especially young children.
When choosing an Internet outlet, you need to remember that a single or double one will be enough for a living room. And for the office, you should think about modular sockets.
Therefore, it is worth thinking about reducing the electromagnetic “smog” in our houses and apartments.
One of these methods is the installation of Internet outlets connected directly to the walls of the room.
Installation of sockets for connecting to the Internet is carried out according to the rules common to all electrical installation products. By analogy, they are produced for hidden and open wiring.
It must be understood that this is only one of the options for providing multipoint Internet access for laptops, desktop computers, mini-servers and personal data storage in the house / apartment / office.
The process of connecting the outlet with your own hands is given in the form of a step-by-step photo instruction below.
Image Gallery
There are two main types: straight and cross. The first type of cable is used to connect end devices (computer / PC, smart TV / Smart TV, switch / Switch) to the so-called router (Router).
The second type of cable is used to connect devices with similar functions (computer - computer, router - router, switch - switch) to each other.
Separately, it is worth mentioning the possibility of checking the presence, and most importantly, the correctness of signals passing through 8 cores of a twisted pair cable. This can be done with a conventional electrical tester.
But first, you need a patch cord (ready-to-use wire at both ends of which are mounted, again in a straight pinout scheme, RJ-45 connectors) and a second unmounted Internet outlet or keystone.
You can buy a regular patch cord both in a store and make it yourself (connectors in a straight pinout pattern). The standard length patch cords range from 0.3m to 5m
We pre-mount the second end of the laid wire into an unmounted socket / keystone, into which we insert one end of the patch cord.
We switch the tester to the sound signal mode and compare the corresponding channels of the connectors on the patch cord and in the Internet outlet. We get a sound signal that indicates the presence of a connection.

Not every electrical tester has a beep mode. Therefore, for verification, you can switch to resistance mode and monitor the data on the digital panel
There is also the option of checking the signals using special cable testers, but this requires another ready-made and direct patch cord. We insert one end of each patch into sockets (new and temporary), insert the other two into the tester cable.
The light and sound accompaniment on the tester panel indicates the presence or absence of a signal on one or another core of the twisted pair. We watch and check the signal.

Some cable testers, in addition to checking the presence of a signal, provide information about the category of the cable. This function is quite useful for certification of premises
Ideally, we will successively receive 8 light and sound signals on the cable tester. With these two methods, you can check the correctness of the pinout and the presence of a full signal for data transmission through a twisted pair.
After checking the signals, we proceed to the final part of installing the Internet outlet.
To do this, carefully hide the rest of the wires and return the terminal block with the connected wires back to the socket socket, tighten the fixing bolts to the built-in “glass”.
The terminal block should “sit” tightly in the socket, there should be no protruding and kinked wires.

If the terminal block does not fit into the recess of the wall, then you can cut out the back of the mounting “glass”. Usually, when planting a terminal block, some pair of mm is missing
Once again we check the correctness of the connection, for this we connect a device, for example, a laptop and see if it detects a connected local network or the Internet.
If there is no connection on the device, we return to the pinout point and re-check the correctness of the actions performed, as well as the quality of the compression. It often happens that one of the cables is corny short in the terminal block. To do this, you just need to drown the core retainer more tightly.
After an additional check of the network's performance, we cut off all the remnants of the protruding cores and proceed to mount the lining. The pad is usually equipped with several plastic latches.
It is enough to accurately attach it to the socket of the socket and press until you hear a click sound. Everything, the Internet socket is installed and ready for use.
They may differ in the location of the contact groups and the set of interfaces, the mounting method, but this does not change the essence of the matter at all:
Connecting single or modular Internet sockets with your own hands is available to any home master, not to mention IT engineers. The main thing from the first time is to “guess” with the color pinout of the wires and get a high-quality data transmission signal through a twisted pair.
You have repeatedly performed electrical work and can you supplement the information in our article with practical recommendations? Or did you install such an outlet with your own hands and encountered an interesting moment that we did not mention here? Please share your tips with our readers - leave comments below this article.
According to the EIA / TIA-568 specification, there are several color schemes for crimping a twisted pair network cable (patch cord) into an RJ-45 connector for connecting a computer to a router, hub, switch, or connecting two computers to each other.
The network plug is usually called RJ-45, although its correct name is 8P8C. And RJ (Registered Jack) is the name of a standard that describes the design of a plug-in connection between a plug and a socket.
All the photographs below show one split utp cable designed for use in LAN (Local Area Network) and DSL (Digital Subscriber Line) networks, with twisted pairs crimped at its ends into RJ-45 plugs.
option B, the most common option.

Twisted pair lan cable crimp color code by option A.
As you can see in the photo, in both versions, the ends of the lan cable are crimped according to the same electrical circuit, only two twisted pairs are swapped. A green twisted pair is crimped in place of the orange twisted pair, and orange is crimped in place of the green twisted pair.
Twisted pairs of utp cables, crimped both in option A and option B, interchangeable. So you can compress according to any color scheme option that you like best, this will not affect the performance of the lan network.
Currently, a twisted pair network cable has appeared on sale, in which instead of the traditional four there are only two twisted pairs. And this is economically justified, since 90% of cable lines for the Internet use only two twisted pairs.

As you can see, the electrical circuit for connecting the RJ-45 pins has not changed, only the blue one is crimped instead of the green pair.

Such a twisted-pair cable according to option B is crimped according to the scheme shown above in the photo. When crimping option A, the pairs are simply swapped. Instead of an orange pair, a blue one is crimped, and instead of a blue one, an orange one.
If you need to create a local lan network of two or more computers without using additional active equipment (hub, switch or router), for example, for group games, then for this case the EIA / TIA specification provides for the following twisted-pair network cable cutting. To create a network of two computers, it is enough to insert one such twisted-pair cable into their network ports.

Please note that the opposite ends of the computer-to-computer twisted-pair lan cable are crimped according to different color schemes.
RJ-45 twisted pairs are crimped with a tool called a crimping tool. If there are no pliers at hand, then you can use twisted pair crimping technology without pliers.
All of the above color schemes for utp twisted pair cable pinouts are currently out of date. Modern network cards, switches, hubs and routers, thanks to the support of Auto-MDIX technology, automatically determine the twisted-pair cable crimping option and perform internal adjustments. So a modern computer, when creating a network, can be connected at least to a hub, or to another computer without thinking about the color scheme for twisted pair cable pinouts.
The PoE IEEE 802.3af standard provides for the possibility of transmitting an information signal and supplying power to the device over a single twisted pair cable crimped with an RJ-45 connector. This eliminates the need for an additional wire for supplying voltage.

Regardless of the RJ-45 crimping options, from the positive output of the power supply, voltage is applied simultaneously to pins 4 and 5 (blue pair), and the negative output to pins 7 and 8 (brown pair).
As a rule, twisted-pair cable pinout according to the PoE IEEE 802.3af standard is used when creating video surveillance systems that use a switch, for example, a 9-port PoE switch ROKA R-KM-POE0801, in which each port has the ability to feed through RJ-45 DC voltage 12 V power up to 30 W.
When connecting a computer to the Internet or creating a local network, rarely does anyone use the full capabilities of a twisted-pair lan cable. This is usually due to a lack of information.
When transmitting a signal over twisted pairs of a CAT5 cable (speed up to 100 Mbps), only two pairs of wires out of the four available in the cable are involved. One pair for signal reception, the second for transmission, which is clearly demonstrated by the above electrical diagram of connecting a computer network card with a twisted pair cable with an RJ-45 connector to a switch hub or router.

As can be seen from the diagram, each of the two pairs of lan cables is connected to a computer and a switch hub or router using a transformer symmetrical circuit. The advantage of the transformer circuit is the suppression of interference and interference and provide a high degree of protection against short circuits and errors when installed in a twisted pair cable.
If it becomes necessary to lay an additional line or if the pairs in the twisted pair network cable are partially damaged, it is possible, without degrading the data transfer rate, to double the number of lines or repair the twisted pair cable by crimping the RJ-45 plugs to previously unused twisted pairs.
The RJ-45 twisted-pair cable crimp color schemes below are the same as above, but they only show the twisted-pair cable's lan conductors that are used to transmit information. Twisted pairs that do not fit close to the RJ45 plug are usually crimped, but the signal is not transmitted over them and they can be used to transmit additional information.

Twisted-pair crimping, option B. The signal is transmitted only on orange and green pairs.

Twisted pair crimping, option A. The signal is also transmitted only over green and orange pairs, but the twisted pairs are crimped in the RJ-45 plug to other contacts.

Crimping twisted pair computer-to-computer. The signal is transmitted only on green and orange pairs.
A patch cord, or as it is also called a patch cord, is designed to connect electronic devices to each other, for example, a computer with a hub, a switch, or two computers to each other if the devices need to be moved relative to each other during operation.
For the manufacture of a patch cord, a twisted pair cable is taken, the cores in which are made of stranded wire so that they do not break with frequent kinks. For crimping such a cable, special RJ-45 connectors are used. ANSI EIA TIA 568B.1 requires a patch cord to be no longer than five meters. Connecting devices using a patch cord is economically feasible if they often move relative to each other during operation.
Despite the rapid development of wireless communications, RJ-45 sockets are still indispensable elements of the structured cabling system of a modern building. We offer to consider their device, types, pinout options and installation methods. The apparent simplicity of the question can be misleading, since there are certain nuances that need to be paid attention to.
Despite the variety of types of twisted-pair sockets, their design is almost identical, with the exception of small details. Let's take a typical external single-port device as an example.
Rice. 1. Basic elements of an external RJ-45 socketDesignations:
Outwardly, the socket resembles a telephone standard RJ-11, the main difference is the number of connector pins, there are eight of them, not four. Accordingly, a computer socket can be used as a telephone socket, but not vice versa.
Different types of devices may have minor characteristic features, but in general the design concept remains unchanged.
The main parameters of these switching devices are determined by the following criteria:
Let's briefly talk about each of them.
More doesn't mean better.
One of the main parameters is the number of ports. As a rule, they can be from one to four. If you want to use more connections, then it is easier to install a patch panel, but such a need indicates ill-conceived network wiring. In addition, it should be borne in mind that a large number of patch cords connected nearby causes some inconvenience.
 Rice. 2. Krauler 4-port external socket
 In practice, when organizing an office or home LAN, one and two-unit modules are mainly used.
This parameter is directly related to the characteristics of the cable used to install the computer network. We are talking about the bandwidth, which determines both the speed of data transfer and the possibility of using special network technologies. Below is a table that shows the relationship of category to bandwidth.

Currently, when installing a LAN, cables with a category below 5e are practically not used.
Execution.
The method of mounting the switching device depends on this parameter. There are two versions:
 Internal two-port RJ-45 socket disassembled and assembled
 As a rule, the choice of one or another version depends on how the LAN wiring is done. If it is external (for example, laid in boxes), external sockets are used. In cases where hidden wiring is done, internal devices look more aesthetically pleasing.
Separately, it is necessary to highlight the sockets that are installed directly on the box. Technically, such a design can be considered both internal and external.

The performance of the LAN is not affected by the execution.
Modular designs.
Speaking of performance, one cannot fail to mention modular designs. This solution allows you to assemble a socket in a standard case for a certain combination, for example, install it in RJ-45 and RJ-11 modules or with a different category.

This should not be a problem, since each contact group is color-coded in accordance with the T568A and T568B standards (it can be marked with the letters "A" and "B", as in the figure below).

It doesn't matter which standard is used, the main thing is that it be of the same type for the LAN, otherwise problems are guaranteed. It is believed that we have adopted a “swaging” of the T568B type, but this is a rather conditional statement.
If you do not know which standard your provider uses, then you can install it by pinouting the connector installed on the cable that enters the apartment.

Let's start with the tool that will be needed to terminate twisted-pair sockets. Ideally, it is desirable to purchase a universal extractor (shown in Figure 9). It allows you to crimp and cut the rest of the wire in one motion. Thanks to Chinese manufacturers, such a universal tool costs about 3-4 dollars. The price of branded products can be 2-3 times more expensive.
 Rice. 9. Universal extractor
 This tool has a special mechanism that allows you to press the wire between two contact knives and cut off its excess (3 in Fig. 9). In addition, it is equipped with a flat screwdriver (2) and a hook (1) that allows you to remove the wire in case of incorrect termination. The cost of a universal extractor is relatively low, and the benefits are quite tangible.
No less useful will be universal pliers for stripping insulation. They cost about the same as an extractor, they can cut a cable Ø3.5-9 mm such as UTP, STP, FTP. It is possible to adjust the depth of the cut.

It is undesirable to use a stripping knife, since in this case there is a high probability of damaging one of the cores of the twisted pair.
Having dealt with the necessary tool, let's move on to the algorithm for embedding a twisted pair into a switching device. We will proceed from the fact that the cable has already been laid, the seat for the socket has been prepared. The procedure is as follows:
 Rice. 11. A - cable with wires separated by clamps, B - pressing with an extractor
 At this stage, we will make a small digression regarding the use of available tools for pressing. Sometimes you can find tips in which, in the absence of the necessary tool for pressing, it is recommended to use a clerical knife or a thin slotted screwdriver. This approach can be used only as a last resort, when you urgently need access to the network, but there is no tool at hand. But in the future, such an outlet must be pinched. Otherwise, it is likely that the wire will lose contact with the latch after a while.
We also note that many branded manufacturers attach a simple plastic extractor to each outlet, which allows you to securely close the wire, after which it remains only to carefully cut off its excess.
When using a shielded cable, you must install an appropriate socket that has a shield connection. Otherwise, it turns into a large antenna, which will not be slow to affect the bandwidth, and, consequently, the data transfer rate. For the same reason, you should not use an STP or FTP cable if ungrounded equipment is connected to it.
Twisted-pair LAN technology requires the use of complete lines. Twisting, adhesions are unacceptable, this leads to serious losses. If, nevertheless, it became necessary to extend a piece of cable, special connectors should be used for this purpose.
 Rice. 12. Twisted pair connectors
 These devices are a box in which a board is installed with two RJ-45 connectors (A in Fig. 12), or twisted-pair latches, like sockets (B in Fig. 12).
It is not recommended to use sockets with more than two ports in domestic conditions. A large number of patch cords in one place will cause them to become tangled. It is better to spread the sockets at some distance.
Reading time ≈ 3 minutes
The Internet today occupies such a role in our lives that now it is practically impossible to find a place where there would be no possibility of connecting to the network. Whether it is a metropolis or a remote village, the Internet takes its place in homes and in the lives of their inhabitants. Almost all modern appliances have the ability to connect, and no one is surprised by an interactive refrigerator or TV. Therefore, installing and connecting sockets for wired Internet is a very relevant topic, and if you have not yet encountered this task, then it is likely that sooner or later this will happen. You can call a wizard from your provider's staff to RJ-45 socket installation, although you can do this work yourself if you wish. Low voltage currents flow in the wires for connecting to the Internet, and when you connect an RJ-45 socket, you can not be afraid of electric shock. If you decide to do the job without resorting to help, this article with a video will help you with this.

The RJ-45 network socket is a standard product, depending on the manufacturer, differing only in appearance. When wondering how many sockets for the phone and how many for the Internet to install, you can not hesitate to install an RJ-45 socket for connecting to the Internet, since you can connect a telephone wire to it and connect a phone.

The wiring diagram for an RJ-45 socket is not particularly difficult. Having removed the outer insulation from the cable by two to three centimeters, we unwind 4 paired cores and clean them of insulation, preferably with a special knife ( stripper). We open the case for the internal connection of the RJ-45 socket. We see that all contacts are highlighted in a certain color corresponding to the desired wire so that it will be difficult to make a mistake. It is necessary to clean the wires in such a way that the wire coming out of the case is covered with external insulation, and the bare part is only at the point of contact with the latch. In network sockets for connecting RJ-45 Legrand, it is not necessary to clean the insulation from twisted pairs.

The contacts of these sockets themselves pierce the protective sheath of the wire. Models of these brands have proven themselves to be reliable, beautiful and easy to connect. RJ-45 socket pin latches work to hold, and you just need to attach the appropriate wire to them and press it from above with a knife or thin screwdriver, or close the special clip provided in some socket models. After making sure that the contacts securely hold the wires at all points, we insert the socket into the socket in the wall and tighten the fixing bolts until the socket is held in the desired position. Screw or put on the top cover. If the network wire is connected to the station, the RJ-45 socket can be immediately used for its intended purpose. The wire from the station must be removed into the wall or into a special wire channel.

In some cases, it makes sense to connect a double RJ-45 socket, since each computer needs its own port to connect to the network. The principle of connection and installation is the same.

 with your own hands how to make?")


")
