It's no secret that when a computer is running, all its electronic components heat up. Some elements heat up quite noticeably. The processor, video card, north and south bridges of the motherboard are the hottest elements of the system unit. Even with normal computer idle time, their temperature can reach 50-60 degrees Celsius. But if the system unit is not periodically cleaned of dust, then the heating of the main components of the computer becomes even greater. Increased heating leads to constant computer freezes, fans run at high speeds, which leads to annoying noise. Overheating is generally dangerous and leads to an emergency shutdown of the computer.
Therefore, the main problem of the entire electronic part of computer technology is proper cooling and effective heat removal. The vast majority of computers, both industrial and home, use heat removal air cooling. It gained its popularity due to its simplicity and low cost. The principle of this type of cooling is as follows. All the heat from the heated elements is transferred to the surrounding air, and the hot air, in turn, is removed from the system unit case using fans. To increase heat transfer and cooling efficiency, the hottest components are equipped with copper or aluminum radiators with fans installed on them.
But the fact that heat removal occurs due to air movement does not mean at all that the more fans are installed, the better the cooling will be overall. Several incorrectly installed fans can do much more harm than solve the problem of overheating, when one correctly installed fan will solve this problem very effectively.
Fans should be selected in the largest size that suits you. For standard cases this size is 80x80mm. But quite often (especially recently) fans of sizes 92x92 and 120x120 mm can be installed in cases. With the same electrical characteristics, a large fan will operate much quieter.
Try to buy fans with more blades - they are also quieter. Pay attention to the stickers - they indicate the noise level. If the motherboard has 4-pin connectors for powering coolers, then buy four-wire fans. They are very quiet, and their automatic speed control range is quite wide.
Between fans receiving power from the power supply through Molex connector and running from the motherboard, definitely choose the second option.
There are fans on sale with real ball bearings - this is the best option in terms of durability.
There are no additional fans in the case.
This is the standard layout for almost all computers sold in stores. All the hot air rises to the top of the computer and is exhausted outside by the fan in the power supply.
The big disadvantage of this type of cooling is that all the heated air passes through the power supply, heating it even more. And therefore, it is the power supply of such computers that most often breaks down. Also, all the cold air is not sucked in in a controlled manner, but from all the cracks of the housing, which only reduces the efficiency of heat transfer. Another disadvantage is the thin air produced by this type of cooling, which leads to the accumulation of dust inside the case. But still, this is in any case better than incorrectly installing additional fans.
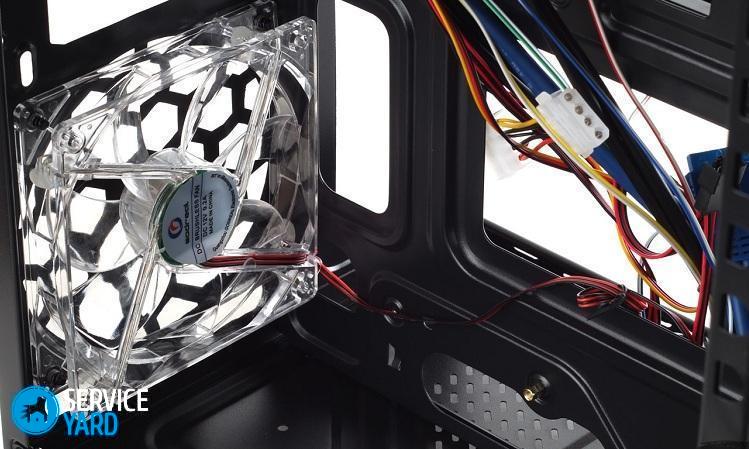
One fan on the rear wall of the case.
This method is used more out of desperation, since the case has only one place to install an additional cooler - on the back wall under the power supply. In order to reduce the amount of hot air passing through the power supply, install one fan that works to “blow” out of the case.
Most of the heated air from the motherboard, processor, video card, and hard drives exits through the additional fan. And the power supply heats up significantly less. Also, the overall flow of moving air increases. But the rarefaction increases, so dust will accumulate even more.
Additional front fan in the case.
When the case has only one seat on the front of the case, or there is no possibility of turning on two fans at once (there is nowhere to connect), then this is the most ideal option for you. It is necessary to install one fan on the front part of the case.
The fan must be installed opposite the hard drives. It would be more correct to write that the hard drives should be placed opposite the fan. This way, the cold incoming air will immediately blow over them. This installation is much more effective than the previous one. A directed air flow is created. The vacuum inside the computer decreases - dust does not linger. When additional coolers are powered from the motherboard, the overall noise is reduced as the fan speeds are reduced.
Installing two fans in the case.
The most effective method of installing fans for additional cooling of the system unit. A fan is installed on the front wall of the case for “blowing”, and on the rear wall – for “blowing”:
A powerful, constant air flow is created. The power supply operates without overheating, since heated air is removed by a fan installed underneath it. If a power supply with adjustable fan speed is installed, the overall noise will be noticeably reduced, and more importantly, the pressure inside the case will be equalized. Dust will not settle.
One rear fan is set to "injection".
A closed air ring is created between the power supply and the additional fan. Some of the hot air from the power supply is immediately sucked back inside. At the same time, there is no air movement in the lower part of the system unit, and therefore cooling is ineffective.
One front fan is set to “exhaust”.
If you install only one front cooler and it works as a blower, then you end up with very low pressure inside the case and ineffective cooling of the computer. Moreover, due to the reduced pressure, the fans themselves will be overloaded, since they will have to overcome the back pressure of the air. The computer components will heat up, resulting in increased operating noise as the fan speeds increase.
The rear fan is for “blowing”, and the front fan is for “blowing”.
An air short circuit is created between the power supply and the rear fan. The air in the area of the central processor works in a circle.
The front fan tries to “lower” the hot air against the natural convection rise, working under increased load and creating a vacuum in the case.
Two additional coolers are set to “blowing”.
An air short circuit is created in the upper part of the housing.
In this case, the effect of the incoming cold air is felt only for the hard drives, since it then enters the oncoming flow from the rear fan. Excessive pressure is created inside the case, which complicates the operation of additional fans.
Two additional coolers operate as a blower.
The most severe operating mode of the cooling system.
There is reduced air pressure inside the case; all case fans and inside the power supply operate under reverse suction pressure. There is not enough air movement inside the air, and, therefore, all components work overheating.
These are, in principle, all the main points that will help you in organizing the correct ventilation system for your personal computer. If there is a special plastic corrugation on the side cover of the case, use it to supply cold air to the central processor. All other installation issues are resolved depending on the structure of the case. We will be glad if you write your thoughts on this matter in the comments to the article.
A computer is a complex device with many components that must operate continuously. Cooling is an integral part of this entire complex system, since each part gives off heat while consuming electricity. If there were no cooling, the risk of sudden “burnout” would increase tenfold. But what to do if the old cooling fails? Definitely, you need to look for a replacement and take on the installation. How to properly install fans in a computer case? You can find the answer to this question in this article.
It will be no secret to anyone that all components of a personal computer tend to heat up. Some of these elements get very hot. The CPU, GPU and motherboard are the hottest parts inside the system unit. That is why every user must take care of proper cooling and high-quality heat dissipation.
Air cooling is most often used in computers because it is very practical and cheap. The operating principle of this mechanism is very simple: the elements give off heat to the air around them, and the hot air is blown out of the system unit case using fans. Also, quite often, PC parts are equipped with heat sink elements (radiators).
The importance of the cooling system is simply obvious, but how to properly install the cooler on the processor and other device components?
Before you start looking for additional coolers, you should carefully examine your gadget:
Here are some tips to help you choose:
If you have purchased all the devices, then you should be wondering how to properly install coolers in the system unit. Now we will answer this question.

In order to install parts into a computer, it is worth familiarizing yourself with several main location variations. We will talk here only about standard cases, since everything is individual for everyone.
This layout is standard for almost all modern personal computers that are sold in electronics stores. Hot air always rises, and the fan in the PSU (power supply) removes it outside.
Important! This arrangement has one noticeable drawback - all the heat that passes through the power supply only heats it up more. Heat transfer also worsens due to the fact that cold air is sucked into the housing chaotically and from all sides.
But even this method is better than incorrect placement of additional equipment.
This method is relevant only if we have only one place for an additional cooler. The device should be located directly under the power supply, which will help ensure proper air circulation without serious consequences for the aforementioned power supply.
Important! And there is one drawback here - dust will accumulate faster than usual, and the reason for this is the increased rarefaction.
How can I install an additional cooler in the system unit in another way? Read on!
This option is also suitable only for those cases in which there is only one seat. The fan should be placed on the front of the PC case, but set to “Blow”. The part must be positioned so that it is opposite the hard drive(s), since all the cold air that enters the device will blow over them.
Important! Such an installation is one of the most effective, because with its help, almost ideal circulation of cold air flows is achieved, and dust will not linger inside. The overall noise level is very low.
Of course, this method will be the most effective of all. Here the installation process is quite simple:
Important! A constant directed air flow will circulate through your device, which will help avoid overheating in any part of the PC. Dust will not settle inside the case at all, the overall noise level will decrease, and the pressure inside will stabilize.
Now you know how to install an additional cooler in a system unit, but what should you be afraid of during installation? Let's talk about incorrect installation.
Important! System overheating also occurs due to increased load in terms of clogging the operating system with junk files.
To reduce the risk of such an adverse event, be sure to install and use.

In order to figure it out, let’s pay a little attention to the following cases of incorrect installation.
Such cooling will not bring any effect, since all the heat that the power supply gives off to the environment will be immediately absorbed back, and in the lower part of the system unit the air will not move at all. This method will not work for anyone.
Using this method of arrangement, you will turn your computer into a real dust collector, since there will be very rarefied pressure inside the case. The fans will work in overload mode, and all neighboring components will overheat terribly.
This location creates a closed air ring that prevents hot air from rising. At this rate, you can only achieve increased low pressure overloads inside, which, again, will affect cleanliness.
In this case, the pressure will be excessively high, which directly proportionally affects the load on the coolers.
The most dangerous mode for the operation of the cooling system. Low pressure prevents the normal operation of all parts; air does not circulate at all, which leads to very rapid overheating.
Important! Even when installing the most powerful coolers, it will not be possible to avoid internal contamination of the system. Read about how and
Understand the efficiency of the air cooling system. Fans don't just supply air to computer components (it's not the most efficient way to cool a computer). Fans must create air flow inside the case - drawing in cold air and expelling hot air.
Examine the fan. Fans create air flow in one direction, indicated by an arrow (indicated on the fan housing). Look at the new fan housing and find the arrow on it; it indicates the direction of air flow. If there is no arrow, examine the sticker on the fan motor. The air flow is usually directed towards such a sticker.
Install fans to create proper air flow. To do this, install fans to blow in and out air. It is better to install more fans for exhaust than for injection to create something like a vacuum inside the case. This effect will cause cold air to enter the housing from any opening.
Install fans. To do this, use four screws (supplied with the fan). Fix the fan firmly so that it does not make noise. Tighten the screws so that you can remove them if necessary.
Connect the fans. Connect two fans to the headers on the motherboard and the rest to the power supply (via Molex connector).
Close the case. It is understood that an air flow will be created inside the case to cool the components, and an open case will not allow such a flow to be created. Remember that components in open cases cool much less efficiently.
Check the operation of the fans. If your fans are connected to the motherboard, you can check their operation by
A cooler serves to provide cool air to your computer while removing hot air from it. If one cooler cannot cope with the operation of a personal computer, then it is always possible to connect an additional one to it, including one or several.
First, let's figure out which fans and where we will install them. First, let's disconnect your computer from the power supply. Then carefully remove the side cover of the system unit with a screwdriver, and then inspect the system unit for the presence of ventilation connectors. Most often, these connectors are located both on the front and back of the case. When a connector is detected, we measure the gap between two adjacent points in the hole for connecting our cooler. They will be located directly in a “square”; it is this side that needs to be measured. With your measurement data ready, feel free to go to a computer store and purchase a cooler of the size you need.
Be sure to check if your motherboard has a three-phase free connector for direct fan connection. It is called “System Fan”, if you cannot find it yourself, then you should resort to the diagram in the instructions for your motherboard. The presence of these connectors depends on the motherboard model; their number can range from one to five. If you do not find a free connector, then purchase a cooler with a direct connection to the power supply itself, or equipped with the adapter it needs.

Find markings on the side of the cooler that will indicate the direction of the air flow and the direction of the rotating blades. If the location is on the front panel, then we set the cooler to “blowing”, but if it’s on the rear panel, then to “blowing”. Simply press the cooler to the desired connection point of the case and secure it with the cutters that come with it. Don’t be alarmed if you find ordinary silicone pins in place of the bolts; they can also be used to attach the cooler.
After you connect the cooler cable (it is connected to the connector on the motherboard, or to the power supply itself), we will turn on our personal computer and check whether our new coolers rotate correctly. If everything rotates correctly, then we will make sure that the rotation is in the right direction. To do this, bring a thin strip of paper. Don't try to stick your fingers into the rotating fans. After everything has been done, we will install it in place and secure the housing cover.
You don't like how your cooling system works, read the article
Fan ( ) – a device that provides processor cooling. As a rule, the cooler is installed on top of the processor itself. There are different models of coolers for different sockets.
There are active and passive coolers. A passive cooler is called a regular radiator. This cooler consumes a minimum of electricity, is very cheap and makes virtually no noise. An active cooler is a radiator with a fan attached to it or one that emits cold (Peltier chips).

Active air coolers are the most widespread. This cooler is an active air cooler and consists of a metal radiator with a fan attached to it. Modern coolers are large in size and weight. Thanks to the use of coolers, computers are relatively small in size. The disadvantage of coolers is the additional acoustic noise they emit during operation.
The fan drives large volumes of air through the radiator fins and this ensures normal thermal conditions for the processor. To determine the direction of air flow, there is no need to connect the cooler to power. The impeller blades will be slightly concave on the side where the air flow exits. Sometimes the cooler body is marked with arrows indicating the rotation of the impeller and the direction of air flow. As with any mechanical device, the rubbing parts of the cooler (rolling and sliding bearings) must be lubricated with machine oil in a timely manner. It is prohibited to use vegetable oils (olive, sunflower, etc.) as a lubricant. After some time, this oil dries out, and it will become impossible to even disassemble the cooler.
You will learn about insufficient lubrication by gradually increasing acoustic noise from the cooler. If this prevention is not done in time, the bearings will wear out intensively, and a new cooler will need to be installed.
The radiator distributes the heat of the cooled object (processor) into the environment. Therefore, it must have direct physical contact with the object being cooled. For the process of heat transfer from the processor to the heatsink, the contact area should be as large as possible. The side of the radiator adjacent to the processor is called the sole (base). From the core, heat passes to the base, then is distributed over the entire area of the radiator and dissipated.
Various materials are used to make cooler radiators.
Axial fans are the most common due to their small size and good performance/noise characteristics. An axial fan is a regular fan with a propeller. The air flow in it is directed along the axis of rotation.
In radial fans (blowers), the air flow is directed at an angle of 90 degrees to the motor axis. In radial fans, instead of a propeller with blades, drums (impellers) spin. This type of fan requires higher power motors. Therefore, blowers are larger in size and more expensive. But radial fans have their advantages. The air flow in them has greater speed, less turbulence and is more uniform.
Fans are also classified by connection method, bearing design and size.
A plain bearing is simply a cushion of oil and sliding materials. These bearings wear out quickly. Their only advantage is their low cost.
Ball bearings are more reliable, durable, and therefore they are mainly used for modern coolers. These are bearings consisting of two radial rings with small balls between them.
The most common fan sizes are: 60x60x25, 50x50x10, 45x45x10.
Based on the connection method, fans are divided into SMART (connection via MOLEX Connector) and conventional (connection via PC-plug connector).
An important parameter of a fan is the noise level it produces. It must be indicated in the documentation for the cooler. For normal operation, such noise should not be higher than 25 dB.
Another important characteristic of a fan is power consumption. Typically it is 0.8 -1.6 W.
The rotation speed of the blades is also an important parameter. This parameter displays the number of revolutions per minute (RPM). The higher this parameter, the more air is distilled per minute, but the more noise is produced. The documentation indicates the amount of air moved per minute (CFM). All computer fans use DC current to power them.
The process of installing a cooler on a processor is very simple if everything is done carefully and without haste. It is advisable to install the cooler on the processor before installing the motherboard in the case. And for additional convenience and safety, it is recommended to install the cooler on a box of suitable sizes, for example, from the motherboard. If you bought a processor in a box (box version together with a cooler), then looking at the base of the cooler, you will see a thin layer of special material there - a thermal interface. It is installed by the cooler manufacturer.
When purchasing a cooler separately from the processor, you need to buy thermal paste (KPT-8, ALSIL). One tube of paste is enough for several cooler installations.


Using a piece of plastic, spread the paste evenly over the entire surface. If a little gets on or behind the edges, it’s not a big deal.


First, hook the bracket onto the socket lip at the edge where there is no plastic lever. Then do this action from the edge where the lever is located.

In addition, there are other options for attaching the cooler.
To install such coolers, you need to insert each cooler leg into the corresponding hole on the motherboard and press until it clicks.

When you turn the head of the leg counterclockwise ninety degrees, the spring is unlocked and the cooler is easily removed.

Intel coolers have the problem of increased load applied to the four attachment points to the motherboard. Some manufacturers use a special mounting plate attached to the back of the motherboard to distribute the load. In this case, coolers have to be installed using screws.

Such coolers can only be installed before the board is secured in the case, since the mounting plate is installed on the back side of the motherboard. The plate must be installed with the correct side, otherwise the contacts can be short-circuited.
The coolers do not differ in their functional purpose; the only difference is in performance and the method of attachment to the radiator. Cooler performance directly depends on the rotation speed and diameter of the impeller. The rotation speed of all coolers varies little and is about 5000 rpm. Therefore, if you choose a cooler to replace, you can only rely on the diameter of the impeller. It should be the same or larger size.
Processors from different manufacturers heat up differently. For example, products from AMD will heat up more than products from Intel. Therefore, the hotter the processor gets, the more powerful the cooler is required to cool it.
For most processors, the included cooler is sufficient. In some cases, for example, if the processor has failed or was purchased without a fan, you will have to choose a cooler separately.
In any case, a good cooler is one that does a good job of cooling the processor. The most well-known brands of coolers are: AAVID, Zalman, ElanVital, AVC, TennMax.
Let's look at popular CPU coolers that are compatible with modern sockets.


Akasa Venom Voodoo
Two fans have been added to Venom Voodoo. You can control their speed using a PWM splitter via the motherboard connector. The cooler delivery set allows installation on earlier platforms. At the top of the Venom Voodoo cooler there is a mesh. It does not affect cooling, and is made simply by design.

Akasa Venom Voodoo
The Akasa cooler has a fairly efficient design. It has six heat pipes in a staggered pattern that quickly remove heat from the processor. The Akasa installation kit includes everything needed to install on a variety of platforms, from AMD AM2 socket to Intel LGA 2011.

Mounts for Akasa
Special Akasa standoffs screw into the built-in support bar located on the LGA 2011 socket. The installation process is quick and easy.


The intake fan is installed on the concave side of the radiator, and the exhaust fan is placed on the other side.

The best cooler
AC company operates in the market of inexpensive equipment and supports only a few interfaces, which makes it possible to keep the price reasonable. The kit includes two mounting kits for LGA 2011 and LGA 1155/1156 sockets. There is also an optional mounting kit that allows you to screw the top bracket directly to the LGA 2011 interface.

Arctic Cooling Freezer i30
To reduce cost, this model uses only four heat pipes with one fan located on a large cooling radiator. The heat pipes are installed close to each other to increase the contact area and reduce gaps.
The installation kit for this model is very simple and does not support LGA 1366, only for LGA 2011 and LGA 1155/1156 sockets.
Before installing the two adapter brackets of the Freezer i30 cooler, install metal spacers on the bolt positions specially built into the support plate of the LGA 2011 socket. You need to screw the adapter strip onto the cross brackets using two short screws.

Arctic Cooling Freezer i30
To complete the cooler installation, you need to attach the fan to the radiator and connect the power.

Arctic Cooling Freezer

CoolerMaster Hyper 212 Evo
The Hyper 212 Evo cooler kit includes: a small tube of thermal paste, an LGA 2011 mounting bracket, and a cooler. The design of the Hyper 212 Evo includes four heat pipes.

Hyper 212 cooler
The heat pipes in contact with the processor are located as close to each other as possible. This technology is called Continuous Direct Contact. The base is well sanded. The installation bracket is foldable, which allows good access between the radiator fins and the base. The unfolded bracket simply needs to be screwed into the built-in plate of the LGA 2011. The cooler is fixed with a steel pin on the top plate.

Continuous Direct Contact
The fan is installed on the radiator and connected to the board.

Continuous Direct Contact

Coolink Corator DS
The cost of Corator DS allowed us to reduce the minimum installation kit, only for LGA 2011. But there are three holes on the installation brackets, which means the cooler can support smaller processor interfaces.
The cooler has semi-flattened tubes located under a uniform piece of copper.

Radiator
When installing, you first need to screw the stand bolts into the support plate, and install cross mounting brackets on them and tighten them with nuts on top. The factory bracket is screwed onto the cross brackets from the kit.

The fan must be installed between two radiators and power must be connected from the board.

Installing a radiator on the motherboard

This cooler uses two fans to create a push-pull system. Corsair added a splitter to connect them to one power connector on the board. The fans do not support PWM control and speed control is carried out through the firmware.
The Corsair A70's radiator is concave on one side to improve air outlet from the center. The heat pipes are separated by a layer of aluminum from which the base is made.

Installation for AMD interfaces uses a snap-on bracket. In this cooler, the mounting screws are screwed from the inside of the A70 base. The support panel and cooler bracket are secured using nuts and screws.

AMD interface
To complete the installation, you must install the fans and connect power.

AMD interface

The ETS-T40 adds an aluminum strip to the fan. This is an advantage among coolers with equal performance.
The installation kit is designed for AMD and Intel platforms. The set of bolts does not require a support plate for the LGA 2011 socket. The radiator fins support the push-pull system of two fans; there is a second set of clamps for this. The ETS-T40 base is made using direct contact technology.


The GX-7 supports two fans. Intel, AM2, AM3 and AM3+ interfaces from AMD are supported. You can choose the airflow direction yourself by turning the GX-7 cooler 90°.
The concave shape of the front side of the cooler directs air to the center of the radiator. The fan blades are illuminated with LEDs, although the frame itself is not transparent.

Mount for Gelid GX-7
To ensure optimal contact with the processor, the base was made in the form of a matte, carefully processed copper block.
To support two fans, the central part of the radiator was reduced, which reduced the cooling surface. I had to add a fifth heat pipe.

Cooler for Gelid GX-7

SilenX EFZ-120HA5
SilenX provides builders with the quietest cooling available. The installation kit provides support for AMD AM2/3 and Intel LGA sockets. The second set of screws allows you to install the LGA 1366 bracket on the LGA 2011 integrated support plate.
The presence of rubber mounting pins in the EFZ-120HA5 kit makes it possible to assemble a push-pull configuration using two fans. But the kit comes with only one fan with a diameter of 120 mm. Three heat pipes are arranged in a V-shape, which is necessary to remove more air through the center of the heatsink.

Heatsink for SilenX EFZ-120HA5
The SilenX installation kit contains a bracket that fits all popular sockets (AMD Socket 939 to AM3+, LGA 775 to 2011), a base plate that supports most common interfaces (except LGA 2011), and a set of installation screws for LGA 2011.

Cooler for SilenX EFZ-120HA5
The most difficult part of installing this model is the fan. First, four rubber T-shaped buttons are pushed into special holes on the fan located on the back side. Then you need the top of the button to slide into the grooves of the radiator.

Xigmatek Venus XP-SD1266
Xigmatek Venus provides support for all the latest Intel and AMD processor interfaces. This model has a slightly larger radiator and is equipped with a 120mm fan, providing high-performance cooling at an affordable price. This model on the AMD platform creates the correct direction of air flow. The kit contains special bolts to support the LGA 2011 socket.
Xigmatek uses a transparent frame with LEDs that illuminate the case well. You can adjust the degree of illumination. The cooler uses six heat pipes.

Heatsink for Xigmatek Venus XP-SD1266
The combination of small size and good thermal capacity is an excellent option for small systems. In the Xigmatek installation kit, the brackets are labeled for Intel and AMD. Although the AMD brackets also have holes for the Intel interface. For the fan, Xigmatek uses rubber buttons as fasteners.

Cooler for Xigmatek Venus XP-SD1266


