Having decided to replace the capacitor on the printed circuit board, the first step is to select a replacement capacitor. As a rule, we are talking about an electrolytic capacitor, which, due to the exhaustion of its working resource, began to create an abnormal mode for your electronic device, or the capacitor burst due to overheating, or maybe you just decided to install it newer or better.
Choosing a suitable replacement capacitor
The parameters of the replacement capacitor must certainly be suitable: in no case should its rated voltage be lower than that of the replaced capacitor, and the capacitance should not be lower in any way, or it may be 5-10 percent higher (if this is permissible in accordance with the known to you diagram of this device) than it was originally.
Finally, make sure the new capacitor will fit in the space that its predecessor leaves. If it turns out to be a little smaller in diameter and height, it’s not scary, but if the diameter or height is larger, the components located nearby on the same board may interfere or it will rest against the elements of the case. These nuances are important to consider. So, the replacement capacitor has been selected, it suits you, now you can start dismantling the old capacitor.
Getting ready for the process
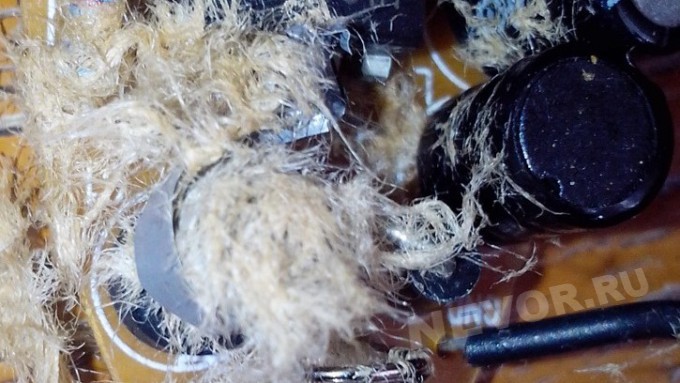
Now it will be necessary to remove the faulty capacitor from the board, and prepare a place for installing a new one here. To do this, you will need, of course, and also conveniently for this action, prepare a piece of copper braid for desoldering. As a rule, the power of a soldering iron within 40 W will be quite enough even if refractory solder was originally used on the board.
As for the copper braid to eliminate solder, if you don’t have one, it’s very easy to make it yourself: take a piece of not very thick copper wire, consisting of thin copper veins, remove the insulation from it, lightly (you can use simple pine rosin) - now these flux-impregnated veins will easily, like a sponge, absorb the solder from the legs of the soldered capacitor.

Soldering the old capacitor
First, look at the polarity of the soldered capacitor on the board: in which direction does it stand with a minus, so that when you solder a new one, you will not make a mistake with the polarity. Usually the minus leg is marked with a stripe. So, when the braid for desoldering is prepared, and the soldering iron is already warm enough, first lean the braid against the base of the one of the legs of the capacitor that you decided to desolder first.
Gently melt the solder on the leg right through the braid so that the braid also warms up and quickly draws solder from the board. If there is too much solder on the leg, move the braid as it fills with solder, collecting all the solder from the leg onto it so that the leg ends up free of solder. Do the same with the second leg of the capacitor. Now the capacitor can be easily pulled out with a hand or tweezers.
Soldering a new capacitor
The new capacitor must be installed in accordance with the polarity, that is, the negative leg to the same place where the negative leg of the soldered one was. Usually, the minus is indicated by a strip, and the plus leg is longer than the minus leg. Treat the legs of the condenser with flux.
Insert the capacitor into the holes. You don't need to shorten the legs. Unbend the legs slightly apart so that the capacitor stays well in place and does not fall out.
Now, warming up the leg near the board itself with the tip of the soldering iron tip, poke the solder to the leg so that the leg is wrapped, wetted, surrounded by solder. Do the same with the second leg. When the solder has cooled, you will have to shorten the legs of the capacitor with wire cutters (to the same length as the neighboring parts on your board).
Starting and running capacitors are used to start and operate electric motors operating in a single-phase 220 V network.
Therefore, they are also called phase shifters.
The installation location is between the power line and the starting winding of the electric motor.
Conventional designation of capacitors in the diagrams

The graphic designation on the diagram is shown in the figure, the letter designation is C and the serial number according to the diagram.
Capacitor capacity-characterizes the energy that the capacitor is able to accumulate, as well as the current that it is able to pass through itself. It is measured in Farads with a multiplying prefix (nano, micro, etc.).
The most used ratings for run and start capacitors are from 1 µF (µF) to 100 µF (µF).
Rated voltage of the capacitor - voltage at which the capacitor is able to operate reliably and for a long time, while maintaining its parameters.
Well-known capacitor manufacturers indicate on its case the voltage and the corresponding guaranteed operating time in hours, for example:
You can check the capacitor using a capacitor capacitance meter, such devices are available both separately and as part of a multimeter - a universal device that can measure many parameters. Consider checking with a multimeter.
All devices have a different designation of the capacitor measurement mode, the main types are shown below in the pictures.
In this multimeter, the mode is selected by the switch, it must be set to Fcx mode. Insert the probes into sockets marked Cx.
Switching the capacitance measurement limit is manual. The maximum value is 100 uF.

This meter has an automatic mode, you only need to select it, as shown in the picture.

Measuring tweezers from Mastech also automatically measure the capacitance, you only need to select the mode with the FUNC button by pressing it until the indication F appears.

To check the capacitance, we read its value on the capacitor case and set a deliberately larger measurement limit on the device. (If it's not automatic)
For example, the nominal value is 2.5 microfarads (μF), on the device we set 20 microfarads (μF).

After connecting the probes to the terminals of the capacitor, we are waiting for the readings on the screen, for example, the time for measuring a capacitance of 40 uF with the first device is less than one second, the second is more than one minute, so you should wait.
If the rating does not correspond to that indicated on the capacitor case, then it must be replaced and, if necessary, an analogue must be selected.
If there is an original capacitor, then it is clear that it is simply necessary to put it in the place of the old one and that's it. Polarity does not matter, that is, the capacitor terminals do not have plus "+" and minus "-" designations, and they can be connected in any way.
It is strictly forbidden to use electrolytic capacitors (you can recognize them by their smaller sizes, with the same capacity, and the plus and minus designations on the case). As a consequence of the application - thermal destruction. For these purposes, manufacturers specially produce non-polar capacitors for operation in the AC circuit, which have a convenient mount and flat terminals for quick installation.
If the required denomination is not available, then you can get it parallel connection of capacitors. The total capacitance will be equal to the sum of the two capacitors:
C total \u003d C 1 + C 2 + ... C p
That is, if you connect two 35 uF capacitors, we get a total capacitance of 70 uF, the voltage at which they can operate will correspond to their nominal voltage.

Such a replacement is absolutely equivalent to one capacitor of a larger capacity.
Oil-filled non-polar capacitors are used to start powerful compressor motors.
The case is filled with oil inside for good heat transfer to the surface of the case. The body is usually metal, aluminum.
The most affordable capacitors of this type CBB65.
To start a less powerful load, such as fan motors, dry capacitors are used, the case of which is usually plastic.
The most common capacitors of this type CBB60, CBB61.
Terminals for ease of connection are double or quadruple.
The most common failure of modern electronics is a malfunction of electrolytic capacitors. If, after disassembling the case of an electronic device, you noticed that there are capacitors on the printed circuit board with a deformed, swollen case, from which poisonous electrolyte oozes, then it's time to figure out how to recognize a breakdown or defect in the capacitor and choose an adequate replacement. Having a professional soldering flux, solder, soldering station, a set of new capacitors, you can easily bring any electronic device to life with your own hands.
In fact, a capacitor is an electronic component, the main purpose of which is the accumulation and release of electricity in order to filter, smooth and generate alternating electrical oscillations. Any capacitor has two most important electrical parameters: capacitance and the maximum constant voltage that can be applied to the capacitor without breakdown or destruction. Capacitance, as a rule, determines how much electrical energy a capacitor can absorb if a constant voltage is applied to its plates, not exceeding a given limit. Capacitance is measured in farads. The most widely used capacitors, the capacity of which is calculated in microfarads (μF), picofarads (pcF) and nanofarads (nF). In many cases, it is recommended to replace a faulty capacitor with a good one with similar capacitance characteristics. However, in repair practice, there is an opinion that a capacitor can be installed in power supply circuits, slightly exceeding the factory parameters in capacity. For example, if we want to replace the broken electrolyte with 100uF 12V in the power supply, which is designed to smooth out fluctuations after the diode rectifier bridge, we can safely set the capacitance even to 470uF 25V. Firstly, the increased capacitance of the capacitor will only reduce the ripple, which in itself is not bad for the power supply. Secondly, the increased limit voltage will only increase the overall reliability of the circuit. The main thing is that the place allocated for the installation of the capacitor is suitable.
The most common reason for an explosion of an electrolytic capacitor is the excess voltage between the capacitor plates. It's no secret that in many Chinese-made devices, the maximum voltage parameter exactly corresponds to the applied voltage. According to their idea, capacitor manufacturers did not foresee that in the regular inclusion of a capacitor in the electrical circuit, it is the maximum voltage that will be applied to its contacts. For example, if 16V 100uF is written on the capacitor, then you should not connect it to a circuit where 15 or 16V will be constantly supplied to it. Of course, he will withstand such a mockery for some time, but the margin of safety will be almost zero. It is much better to install such capacitors in a circuit with a voltage of 10-12V. So that there is some kind of voltage margin.
Electrolytic capacitors have a negative and a positive electrode. As a rule, the negative electrode is identified by the marking on the body (a white longitudinal strip behind the “-” signs), and the positive lining is not marked in any way. The exception is domestic capacitors, where, on the contrary, the positive terminal is marked with a “+” sign. When replacing capacitors, it is necessary to compare and check whether the polarity of the capacitor connection corresponds to the marking on the printed circuit board (the circle where there is a shaded segment). By matching the negative strip with the shaded segment, you will correctly insert the capacitor. It remains only to cut the legs of the capacitor, process the soldering points and solder with high quality. If you accidentally reverse the polarity of the connection, then even a completely new and completely serviceable capacitor will simply break, smearing all adjacent components and the printed circuit board with a conductive electrolyte along the way.
It is no secret that replacing low-voltage capacitors can be harmful to health only in the event of a polarity connection error. When first turned on, the capacitor will explode. The second danger to be expected from capacitors is the voltage between its plates. If you've ever dismantled power supplies from computers, then you probably noticed huge 200V electrolytes. It is in these capacitors that dangerous high voltage remains, which can seriously injure you. Before replacing the power supply capacitors, we recommend that you completely discharge it either with a resistor or with a 220V neon lamp.
Useful advice: such capacitors really do not like to be discharged through a short circuit, so do not close their terminals with a screwdriver in order to discharge.
In the element base of a computer (and not only) there is one bottleneck - electrolytic capacitors. They contain an electrolyte, an electrolyte is a liquid. Therefore, heating such a capacitor leads to its failure, as the electrolyte evaporates. And heating in the system unit is a regular thing.
Therefore, the replacement of capacitors is a matter of time. More than half of motherboard failures in the middle and lower price categories are due to dried or swollen capacitors. Even more often, for this reason, computer power supplies break down.
Since the print on modern boards is very dense, you need to be very careful when replacing capacitors. It is possible to damage and at the same time not notice a small unpackaged element or break (close) the tracks, the thickness and distance between which is slightly more than the thickness of a human hair. It's hard to fix this later. So be careful.
So, to replace the capacitors, you will need a soldering iron with a thin tip with a power of 25-30W, a piece of thick guitar string or a thick needle, soldering flux or rosin.
In the event that you reverse the polarity when replacing an electrolytic capacitor, or install a capacitor with a low voltage rating, it may well explode. And here's what it looks like:
So carefully select the replacement part and install it correctly. On electrolytic capacitors, a negative contact is always marked (usually a vertical stripe of a color different from the body color). On the printed circuit board, the hole for the negative contact is also marked (usually with black hatching or solid white). The ratings are written on the capacitor case. There are several of them: voltage, capacitance, tolerances and temperature.
The first two are always present, the others may or may not be present. Voltage: 16V(16 volts). Capacity: 220µF(220 microfarads). These values are very important when replacing. The voltage can be chosen equal or with a higher denomination. But the capacitance affects the charging / discharging time of the capacitor and in some cases can be important for the circuit section.
Therefore, the capacity should be selected equal to that indicated on the case. On the left in the photo below is a green swollen (or leaky) capacitor. In general, there are constant problems with these green capacitors. The most frequent candidates for replacement. On the right is a working capacitor, which we will solder.

The capacitor is soldered as follows: first, find the legs of the capacitor on the reverse side of the board (for me this is the most difficult moment). Then heat one of the legs and lightly press on the condenser body from the side of the heated leg. As the solder melts, the capacitor tilts. Carry out the same procedure with the second leg. Usually the capacitor is removed in two steps.
No need to rush, push hard too. The motherboard is not a double-sided textolite, but a multilayer one (imagine a waffle). Due to excessive diligence, the contacts of the inner layers of the printed circuit board can be damaged. So without fanaticism. By the way, long-term heating can also damage the board, for example, lead to delamination or separation of the pad. Therefore, it is also not necessary to press hard with a soldering iron. We lean the soldering iron, slightly press on the capacitor.


After removing the damaged capacitor, holes must be made so that the new capacitor is inserted freely or with little effort. For these purposes, I use a guitar string of the same thickness as the legs of the part to be soldered. A sewing needle is also suitable for these purposes, however, the needles are now made from ordinary iron, and the strings from steel. There is a chance that the needle will seize with solder and break when you try to pull it out. And the string is flexible enough and steel with solder seizes much worse than iron.

When dismantling capacitors, solder most often clogs holes in the board. If you try to solder the capacitor in the same way that I advised you to solder it, you can damage the contact pad and the track leading to it. Not the end of the world, but a very undesirable occurrence. Therefore, if the holes are not clogged with solder, they just need to be expanded. And if you still scored, then you need to firmly press the end of the string or needle to the hole, and on the other side of the board, lean the soldering iron against this hole. If this option is inconvenient, then the soldering iron tip must be leaned against the string almost at the base. When the solder melts, the string will go into the hole. At this point, you need to rotate it so that it does not seize with solder.
After receiving and expanding the hole, you need to remove excess solder from its edges, if any, otherwise, during the soldering of the capacitor, a tin cap may form, which can solder adjacent tracks in places where the seal is dense. Pay attention to the photo below - how close the tracks are to the holes. It is very easy to solder this, but it is difficult to notice, since the installed capacitor interferes with the review. Therefore, it is very desirable to remove excess solder.

If you don’t have a radio market nearby, then most likely there will only be a second-hand capacitor for replacement. Before installation, its legs should be processed, if necessary. It is advisable to remove all solder from the legs. I usually smear the legs with flux and clean the tip of the soldering iron, the solder is collected on the tip of the soldering iron. Then I scrape the legs of the capacitor with a clerical knife (just in case).

That, in fact, is all. We insert the capacitor, lubricate the legs with flux and solder. By the way, if pine rosin is used, it is better to grind it into powder and apply it to the installation site than to dip the soldering iron into a piece of rosin. Then it will be neat.

Repair conditions are different and changing the capacitor on a multilayer (PC motherboard, for example) printed circuit board is not the same as changing the capacitor in the power supply (single-layer single-sided printed circuit board). You have to be extremely careful and vigilant. Unfortunately, not everyone was born with a soldering iron in their hands, and it is very necessary to repair (or try to repair) something.
As I wrote in the first half of the article, capacitors are the most common cause of breakdowns. Therefore, replacing capacitors is the most common type of repair, at least in my case. Specialized workshops have special equipment for this purpose. If it is not there, you have to use the usual equipment (flux, solder and soldering iron). This is where experience helps a lot.
The main advantage of this method is that the contact pads of the board will have to be subjected to heat to a much lesser extent. At least twice. Printing on cheap motherboards quite often peels off from heating. The tracks come off, and fixing this later is quite problematic.
The disadvantage of this method is that you still have to put pressure on the board, which can also lead to negative consequences. Although from my personal experience I have never had to press hard. In this case, there is every chance to solder to the legs left after the mechanical removal of the capacitor.
So, the replacement of the capacitor begins with the removal of the damaged part from the motherboard.

You need to put your finger on the capacitor and with a slight pressure try to shake it up and down and left and right. If the capacitor swings left and right, then the legs are located along the vertical axis (as in the photo), otherwise they are horizontal. You can also determine the position of the legs by the negative marker (a strip on the capacitor case indicating the negative contact).
Next, you should press on the capacitor along the axis of its legs, but not sharply, but smoothly, slowly increasing the load. As a result, the leg is separated from the body, then we repeat the procedure for the second leg (press from the opposite side).
Sometimes the leg is pulled out along with the capacitor due to poor solder. In this case, you can slightly expand the resulting hole (I do this with a piece of guitar string) and insert a piece of copper wire into it, preferably the same thickness as the leg.

Half of the work is done, now we go directly to replacing the capacitor. It is worth noting that the solder does not adhere well to that part of the leg that was inside the capacitor case and it is better to bite it off with wire cutters, leaving a small part. Then the legs of the capacitor prepared for replacement and the legs of the old capacitor are soldered and soldered. It is most convenient to solder the capacitor by attaching it to the board at an angle of 45 degrees. Then it can be easily put at attention.

The view as a result, of course, is unaesthetic, but this method also works much simpler and safer than the previous one in terms of heating the board with a soldering iron. Happy repair!
If the materials of the site turned out to be useful to you, you can support the further development of the resource by giving him (and me) .
Author: elremont from 26-01-2014 Was it one of those days when a cat chewed on your module? Or maybe you have an old amplifier where this nasty poisonous slime flowed from the capacitors? If you have ever been in this situation, then you could repair the module by replacing the capacitors. Let's take an example where I will replace this capacitor on a PCB. First, a little theory. What is a capacitor? A capacitor is an energy storage device that can be used to smooth voltage. Each capacitor has two important parameters: capacitance and voltage. Capacitance tells us how much energy a capacitor can store at a given voltage. Capacitance is usually measured in microfarads (uF). In ninety-nine percent of cases, when replacing a capacitor, the same capacitance value or a very close one should be used. A 470uF capacitor is used here. If I want to replace it, then ideally I should take another 470uF capacitor. Another important parameter is the nominal voltage. The rated voltage is the maximum voltage at which the capacitor can operate without exploding. Again, the voltage written on the capacitor means that this is the maximum voltage that can be applied to the capacitor. This does not mean that there will necessarily be this voltage on the capacitor. For example, this is a 16 volt capacitor. This does not mean that it is charged at 16 volts, like a battery. This means that if you charge it up to 5 volts, then it will work fine. If I charge it up to 10 volts everything will be fine. If I charge it up to 16 volts, then it can handle it. But if I charge it up to 25 volts, it will explode. Returning to our example of a capacitor, I see that it is rated for 16 volts. When replacing, I must use a capacitor of 16V or higher. Now it turns out that all the 470 uF capacitors I have are rated at 25 volts. But it's not a problem. If the original circuit requires a 16V capacitor, then I can use a 25V capacitor, it just means I have more safety margin. Now let's talk about polarity. There will always be a small minus symbol on the negative side of an electrolytic capacitor. All you have to do is make sure the polarity matches the original capacitor. If you reverse the polarity, this is what happens. So now, knowing the polarity, I will replace the capacitor and solder it in place. Finally, a small safety warning. If you have ever seen these most capacitors for voltages over 200 volts, then you must be careful not to touch them if they are charged. Remember that a capacitor charged at 200V can kill you.
Happy capacitor replacement!
_


